DAV - Calendar and Contact integration
The YetiForce system enables integration with other email applications, which allows data exchange between YetiForce and external programs. The CalDAV and CardDAV protocols are used for this purpose, to synchronize the calendar and contacts, respectively, between different devices and applications. It allows for the integration of YetiForce with email clients, calendars, and address book applications.
What does this mean for the user?
- Calendar Sync: You can add, edit, and delete events in your YetiForce calendar from any device that supports CalDAV (e. g., mobile phone, tablet, computer). Changes will be automatically synced across all devices.
- Contact Sync: Similar to your calendar, you can manage your contacts in YetiForce using any CardDAV client. Adding, editing, and deleting contacts will be synced across devices.
Note! To integrate YetiForce with DAV you need the paid Outlook Integration Panel & DAV add-on, available in the YetiForce Marketplace.
Below is a step-by-step guide to configuring DAV integration in the YetiForce system.
1. YetiForce configuration
To use the DAV service you must first make sure your YetiForce system has been properly configured.
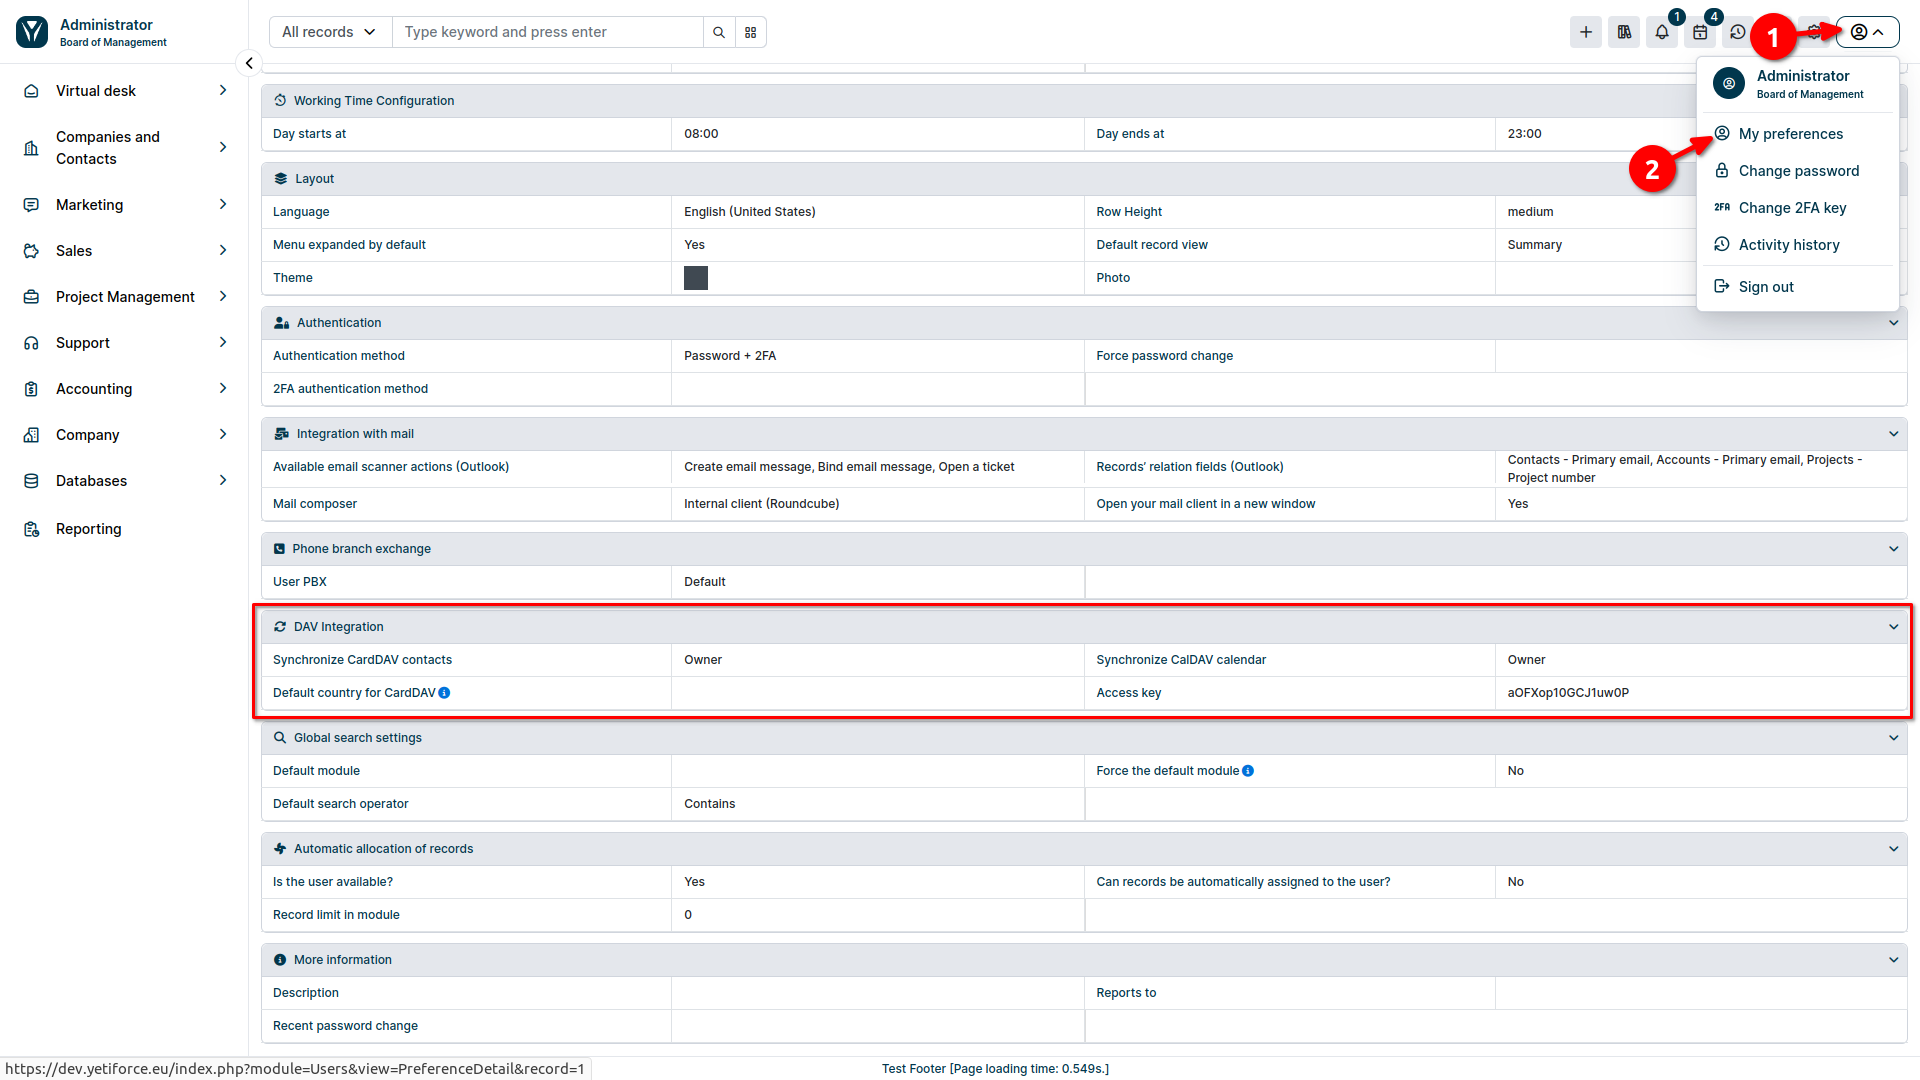
a. Permissions set up
- Select the user icon in the upper right corner.
- From the menu that appears, select My Settings.
- In the settings list, go to the
DAV Integrationsection. - Set appropriate access permissions for CardDAV and CalDAV.
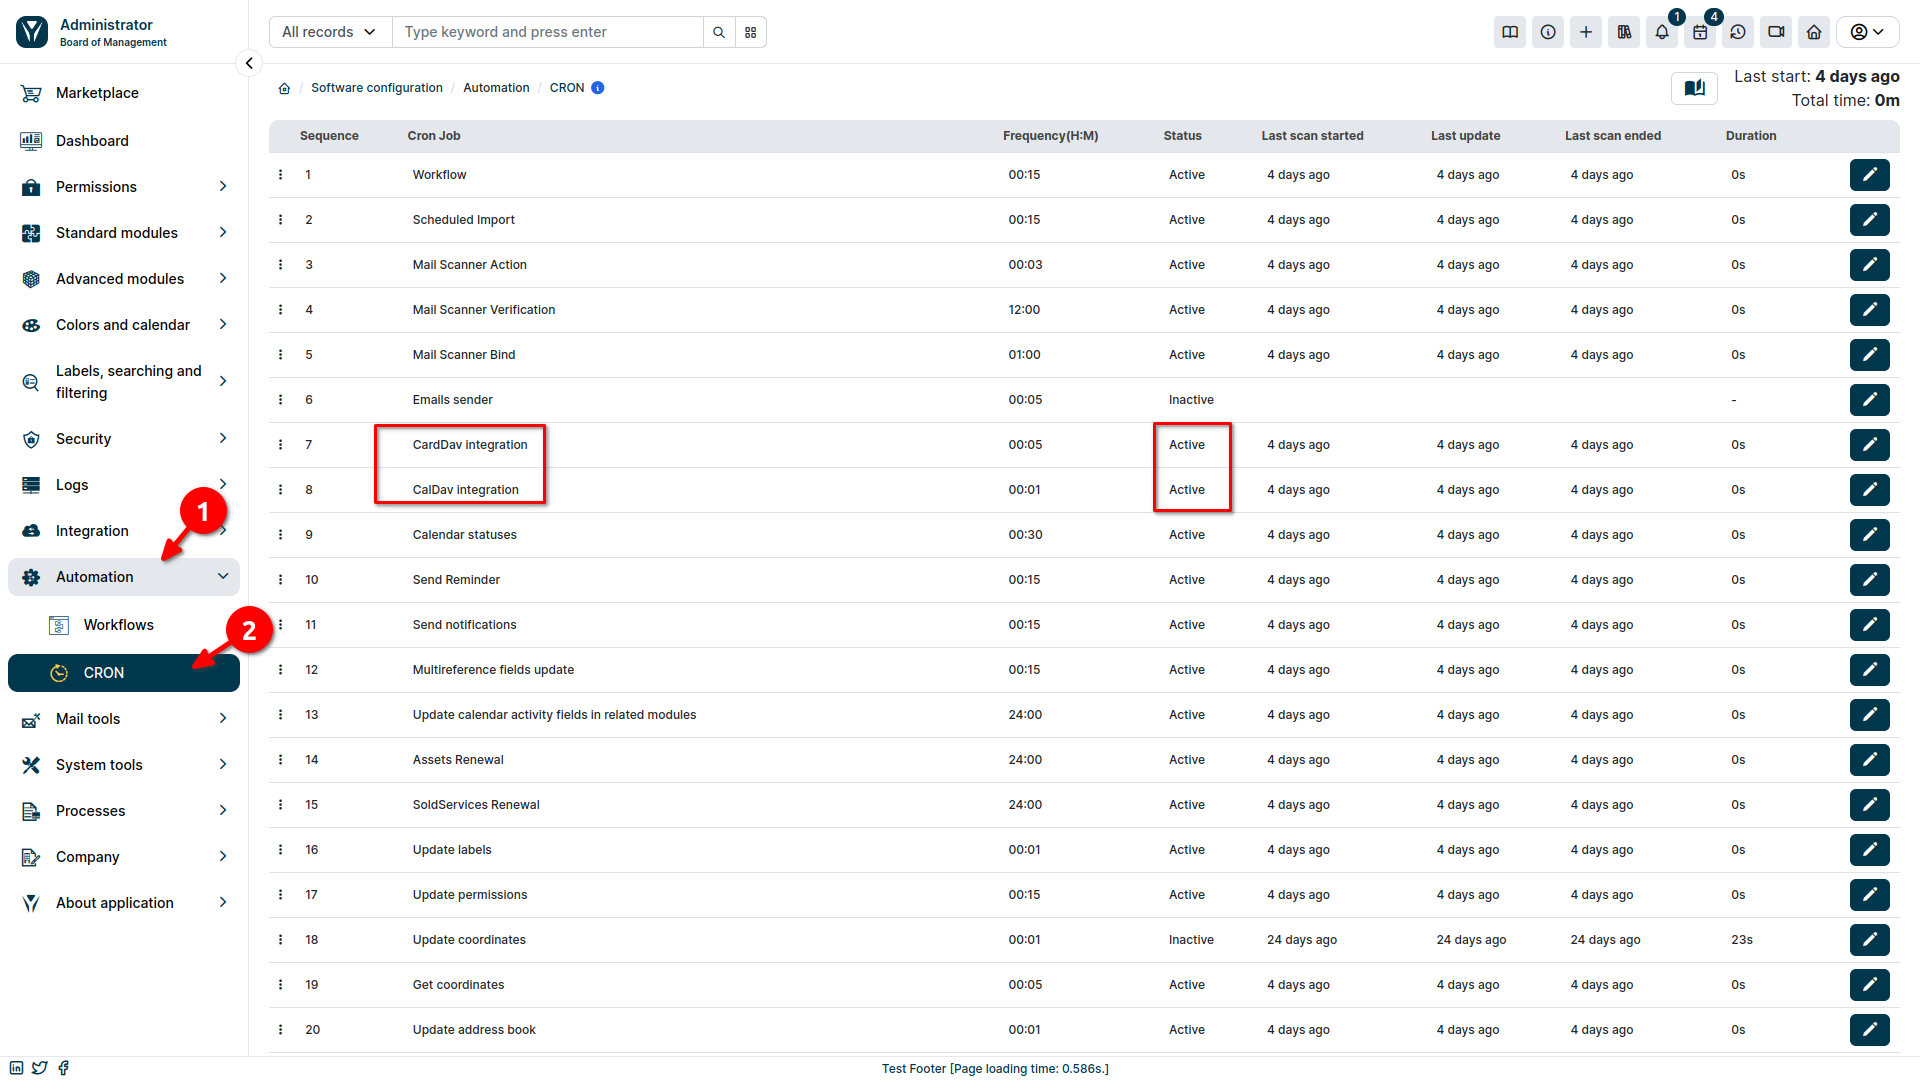
b. Launch relevant CRON jobs
CRON jobs play a key role in data synchronization between YetiForce and external services such as DAV. They allow scripts to be run automatically at specified intervals, ensuring continuous and seamless exchange of information. Therefore, it is important to make sure that the necessary CRON jobs are run. To do this:
- In the administration section in the left menu, select
Automation ➔ CRON - Make sure that the
CardDAV IntegrationandCalDAV Integrationtriggers have theActivestatus.
c. Enable DAV in configuration files
- Open the file
config/Api.php. - Add the
davelement to the array in the$enabledServicesvariable. - Set the values of the
enableCardDAVandenabledCalDAVvariables to true, depending on what you want to sync (contacts, calendars, or both).
Below is some sample PHP code:
public static $enabledServices = ['webservice', 'dav'];

public static $enableCardDAV = true;

public static $enableCalDAV = true;
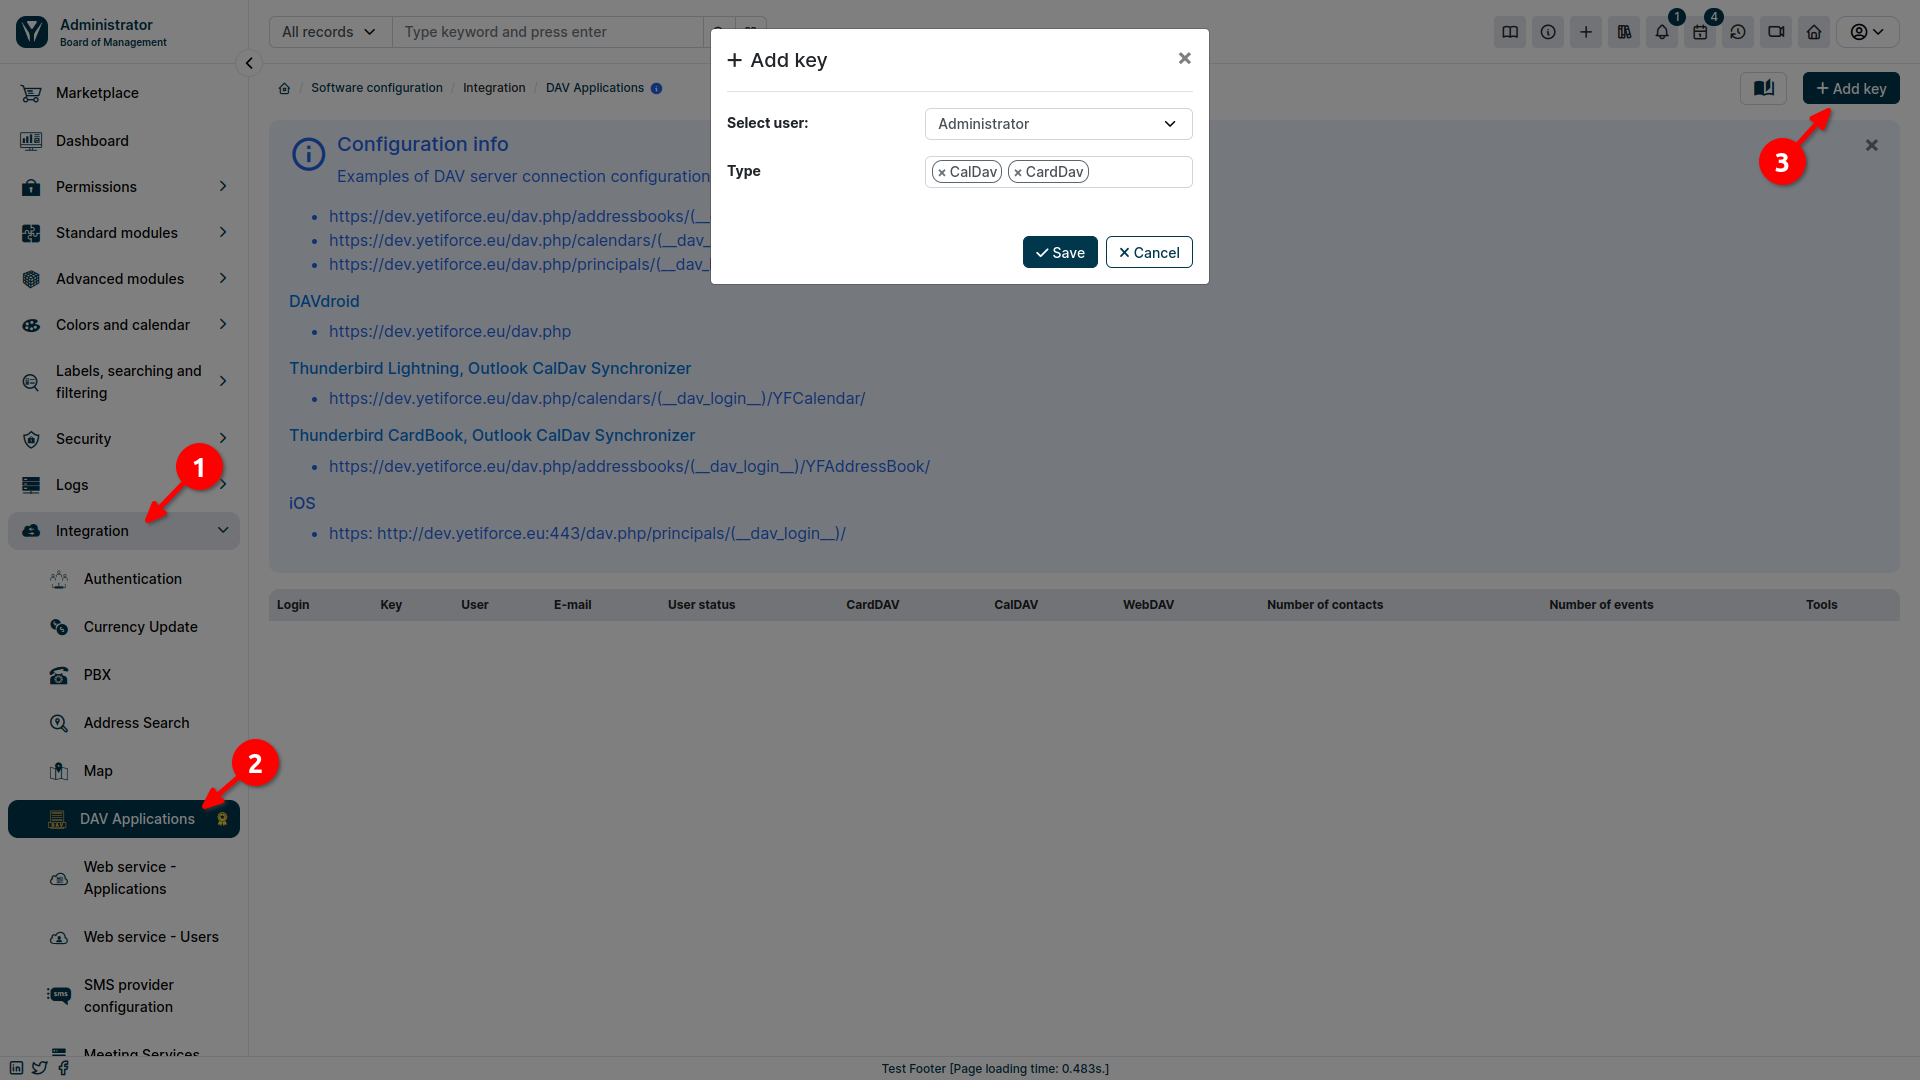
2. Adding an authorization key
Once the YetiForce system is properly set up, you need to generate a key that will enable integration with the DAV service.
- In the administration section in the left menu, select
Integration ➔ DAV application. - Click the Add Key button.
- In the popup window select the user for whom you want to generate a key, and then specify the synchronization type:
- CalDav: Calendar synchronization.
- CardDav: Contact synchronization.
3. Integration of YetiForce with mail tools
We will demonstrate how to integrate YetiForce with an email tool, using Thunderbird as an example.
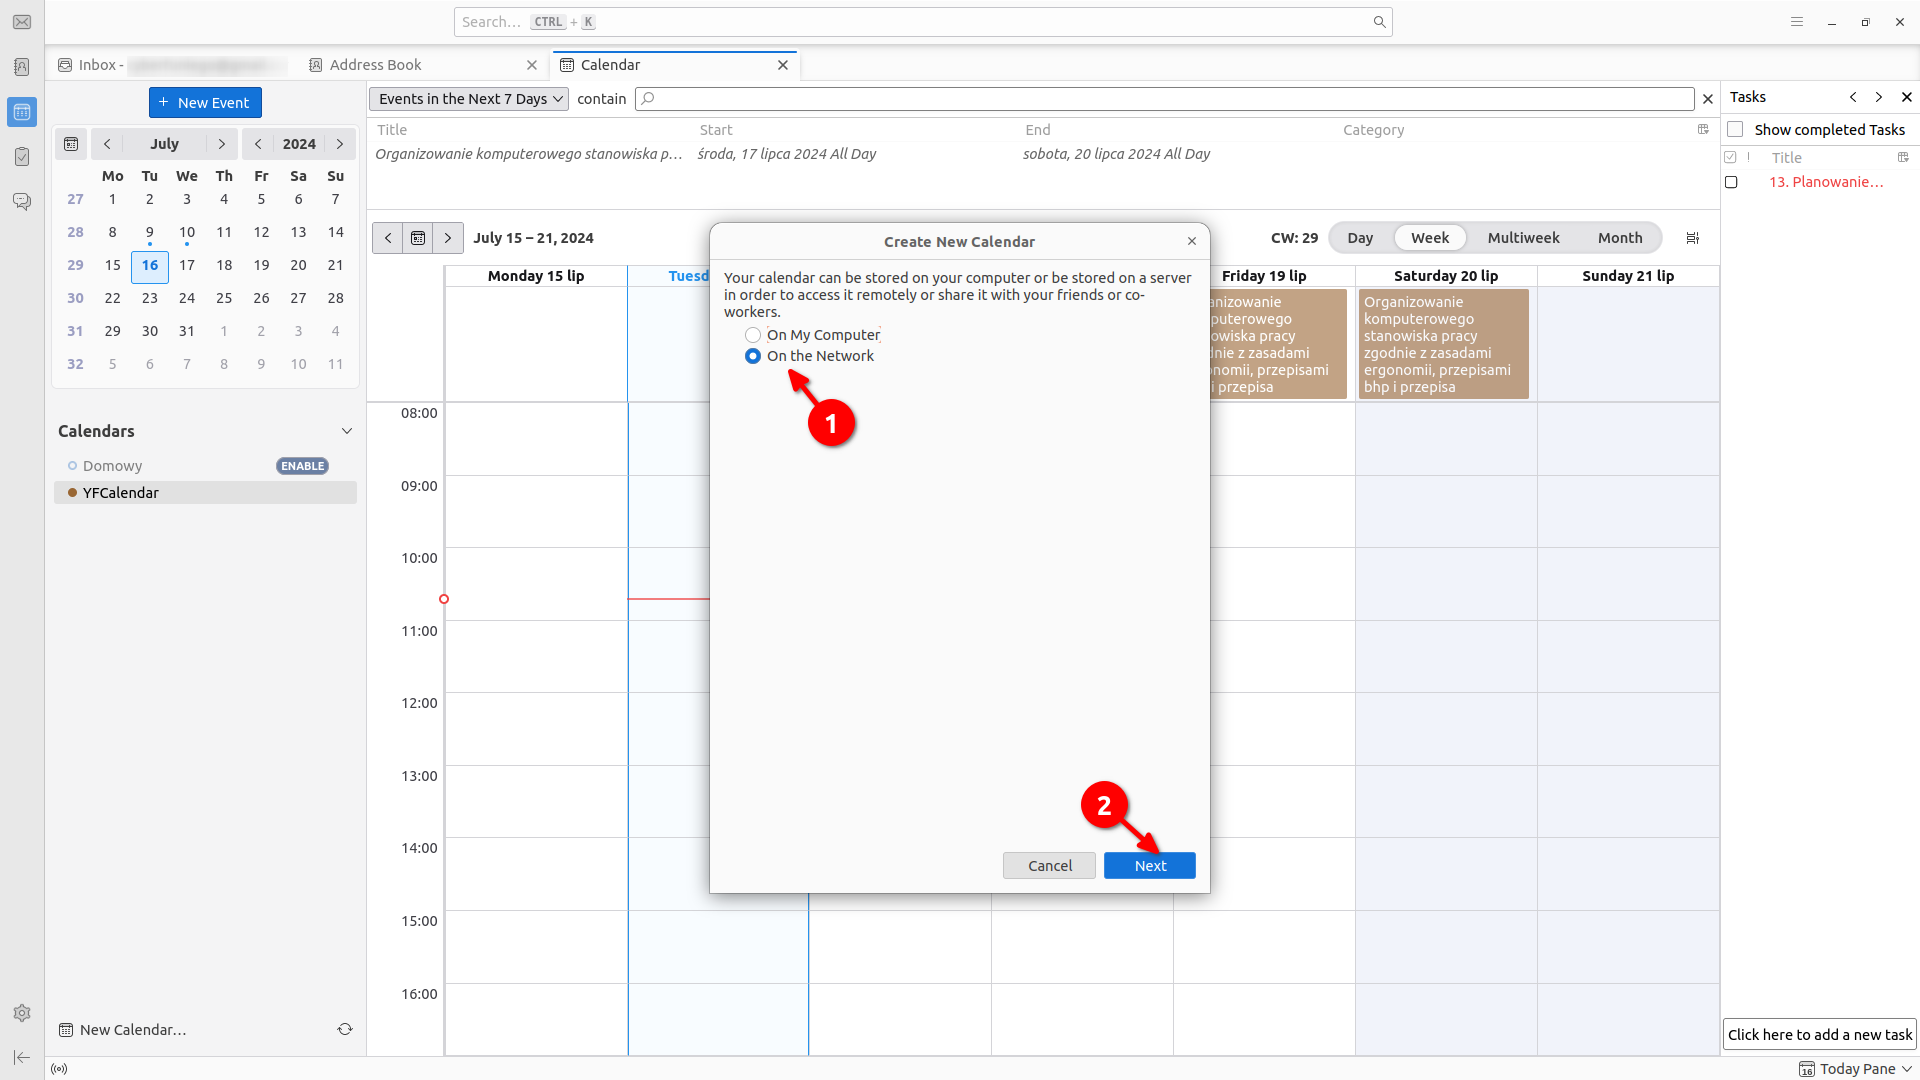
a. CalDAV: Calendar Sync
- Launch Thunderbird on your computer.
- From the left menu, select the Calendars tab
- In the list of available calendars, right-click and select New Calendar from the menu that appears.

- In the modal window, select Remote Calendar and proceed.
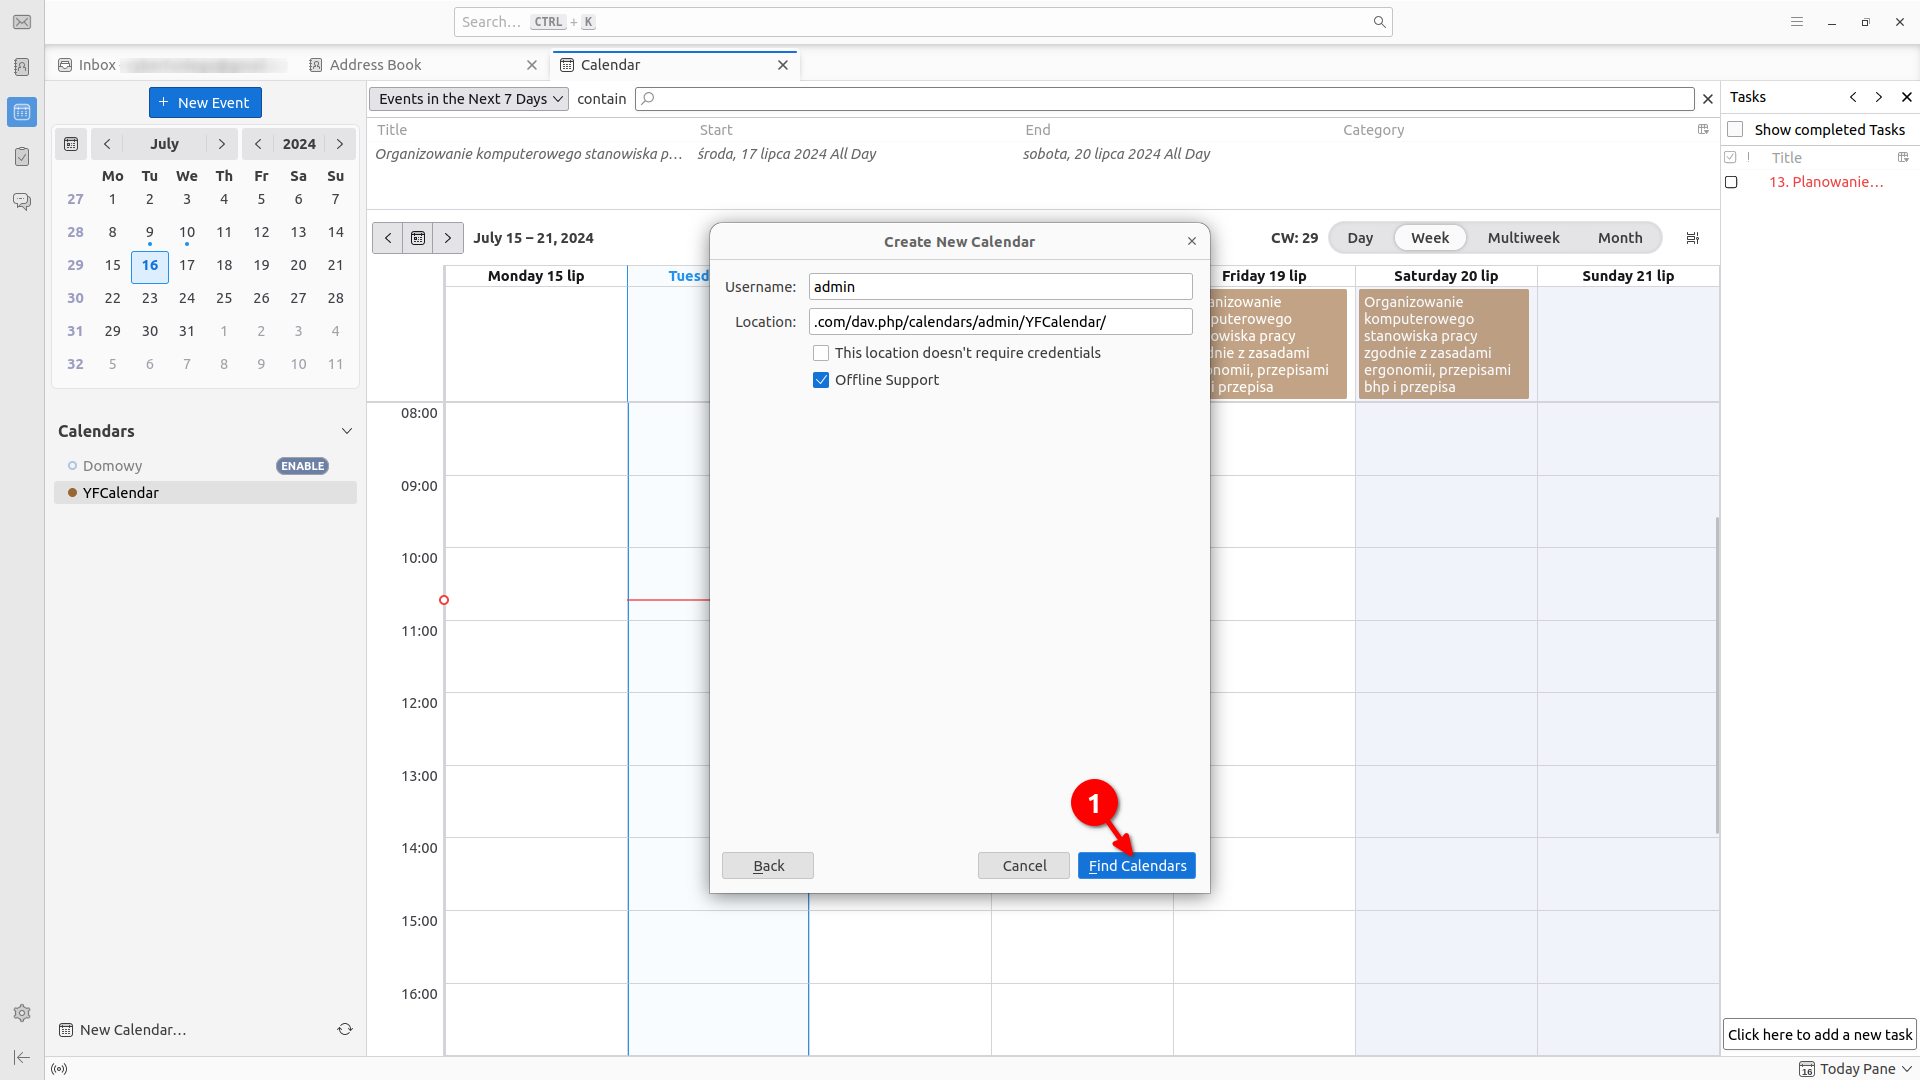
- In the next step, fill the form as follows:
- Username: the
Loginvalue that appeared with the generated key. - Location: An appropriately configured address, in the form:
https://dev.yetiforce.eu/dav.php/calendars/(__dav_login__)/YFCalendar/, where the string(__dav_login__)is replaced with theLoginvalue from the generated key.
- Username: the
- Click the Find calendar button.
- Provide the following in the calendar login window:
- Username: the
Loginvalue that appeared with the generated key. - Password: the
Keyvalue that appeared with the generated key.
- Username: the
After completing the steps above, the YetiForce calendar should successfully synchronize with your calendar. This means that adding, editing, or deleting an event or task in one application will be reflected in the others. Communication between YetiForce and the external calendar will occur automatically in both directions via the CRON mechanism, according to the frequency set in the calendar, ensuring data consistency and simplifying event management.
b. CardDAV: Contacts Sync
- Launch Thunderbird on your computer.
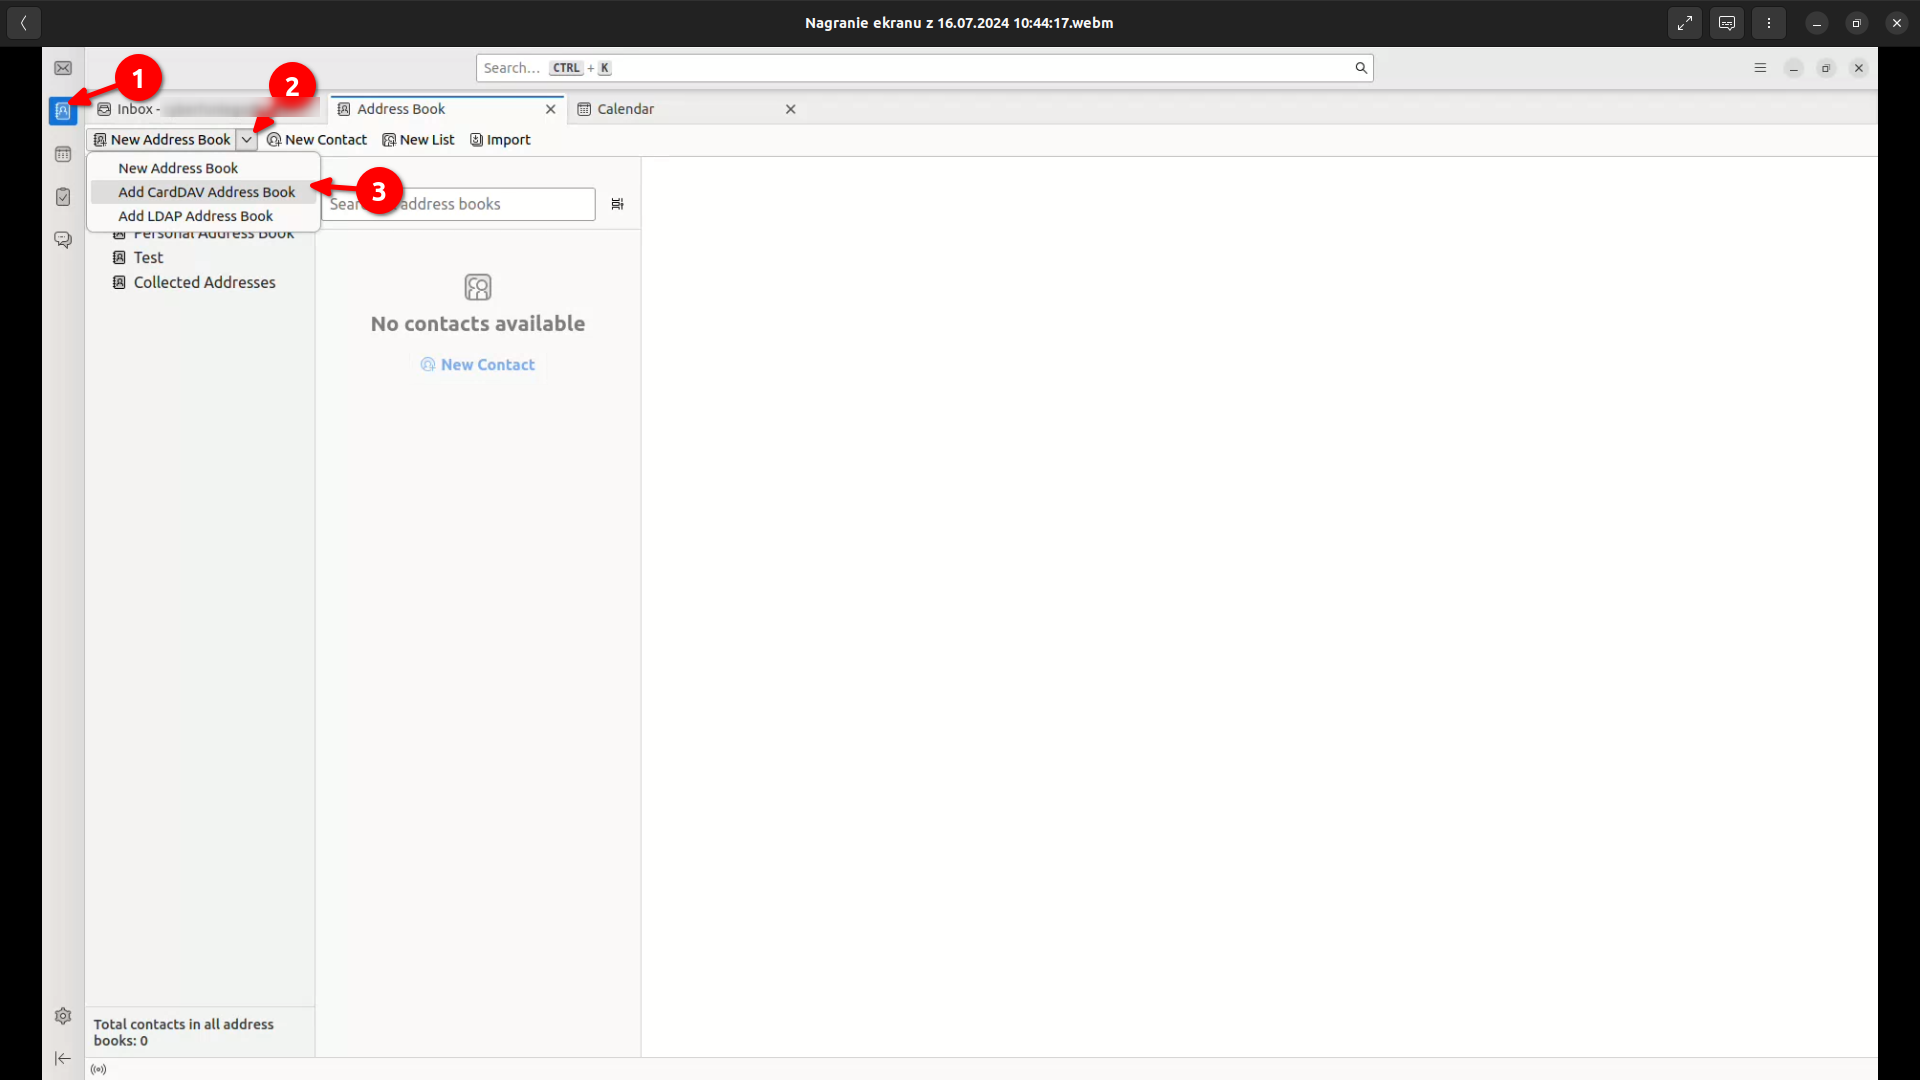
- From the left menu, select the Address Book tab
- Click the New Address Book button.
- From the menu select Add CardDAV Address Book.
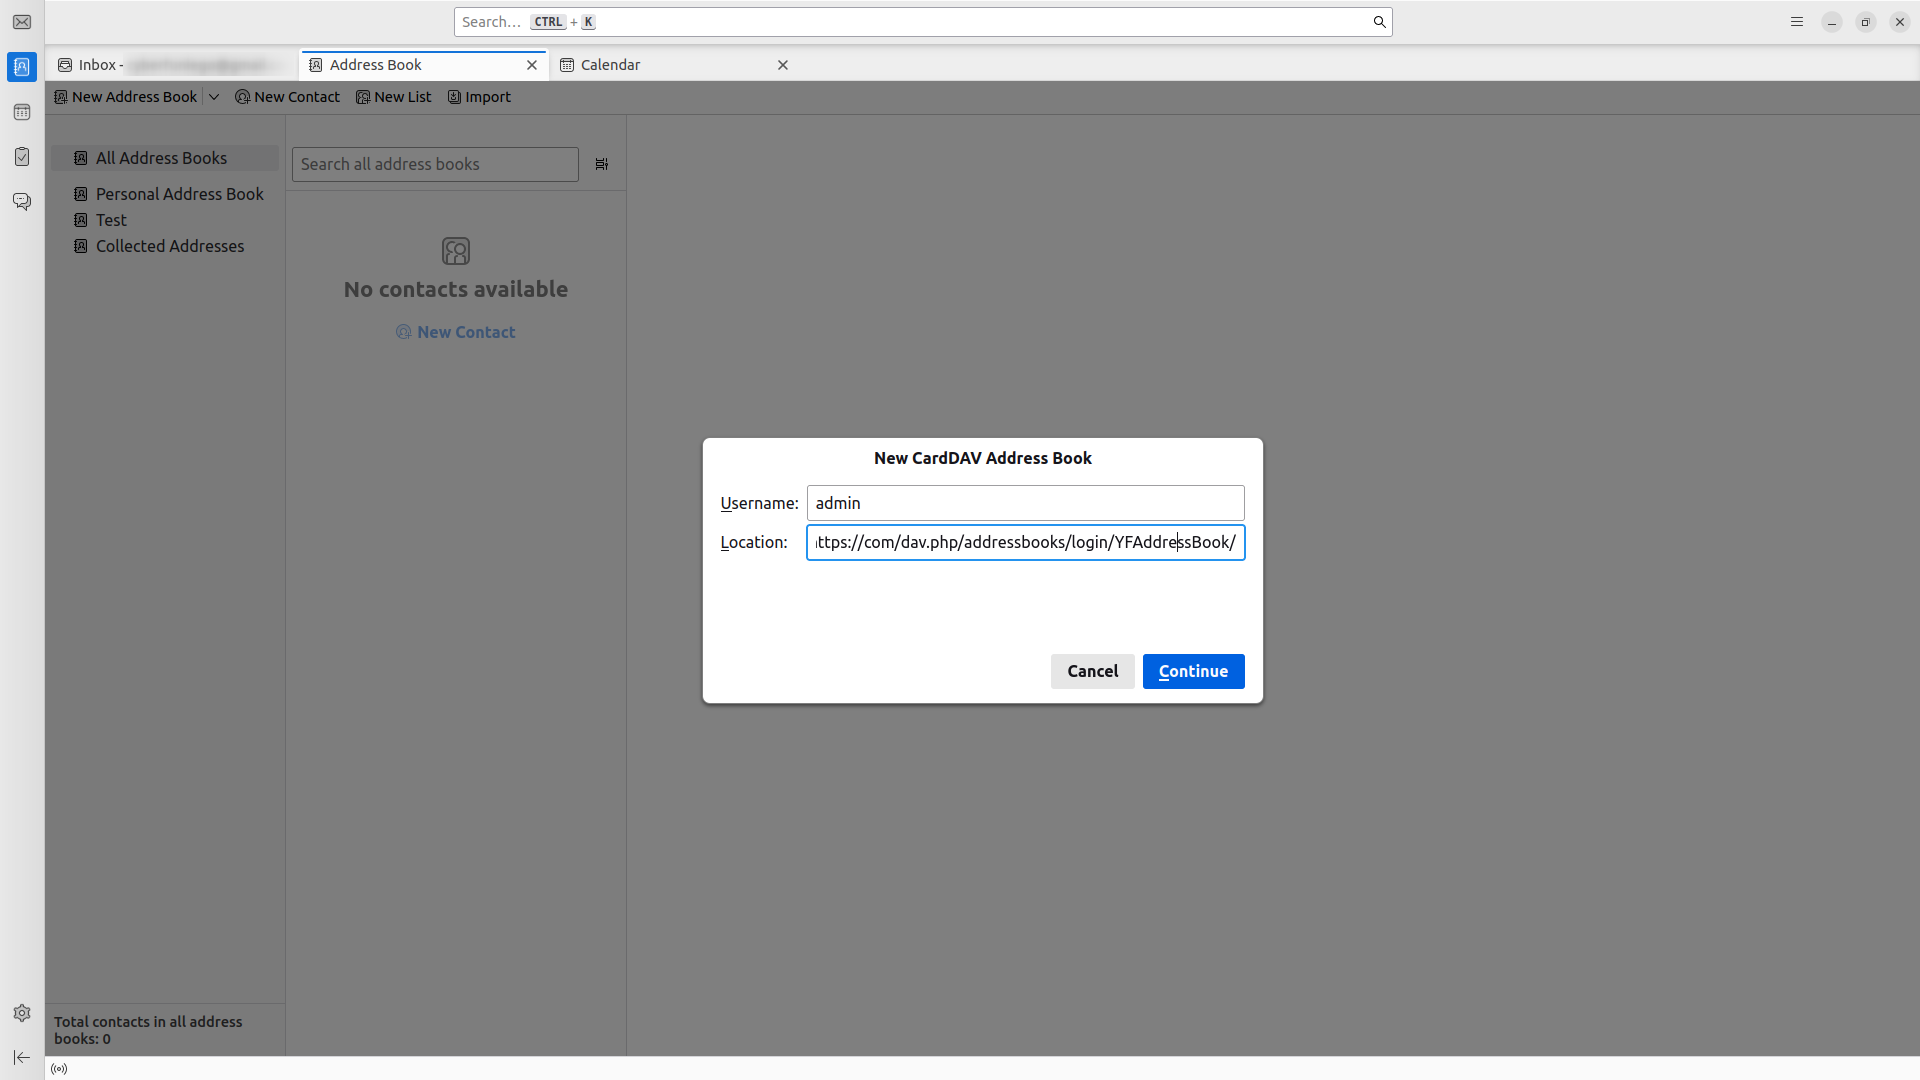
- Fill out the form in the popup window:
- Username: the
Loginvalue that appeared with the generated key. - Location: An appropriately configured address, in the form:
https://dev.yetiforce.eu/dav.php/addressbooks/(__dav_login__)/YFAddressBook/, where the string(__dav_login__)is replaced with theLoginvalue from the generated key.
- Username: the
- Click Continue.
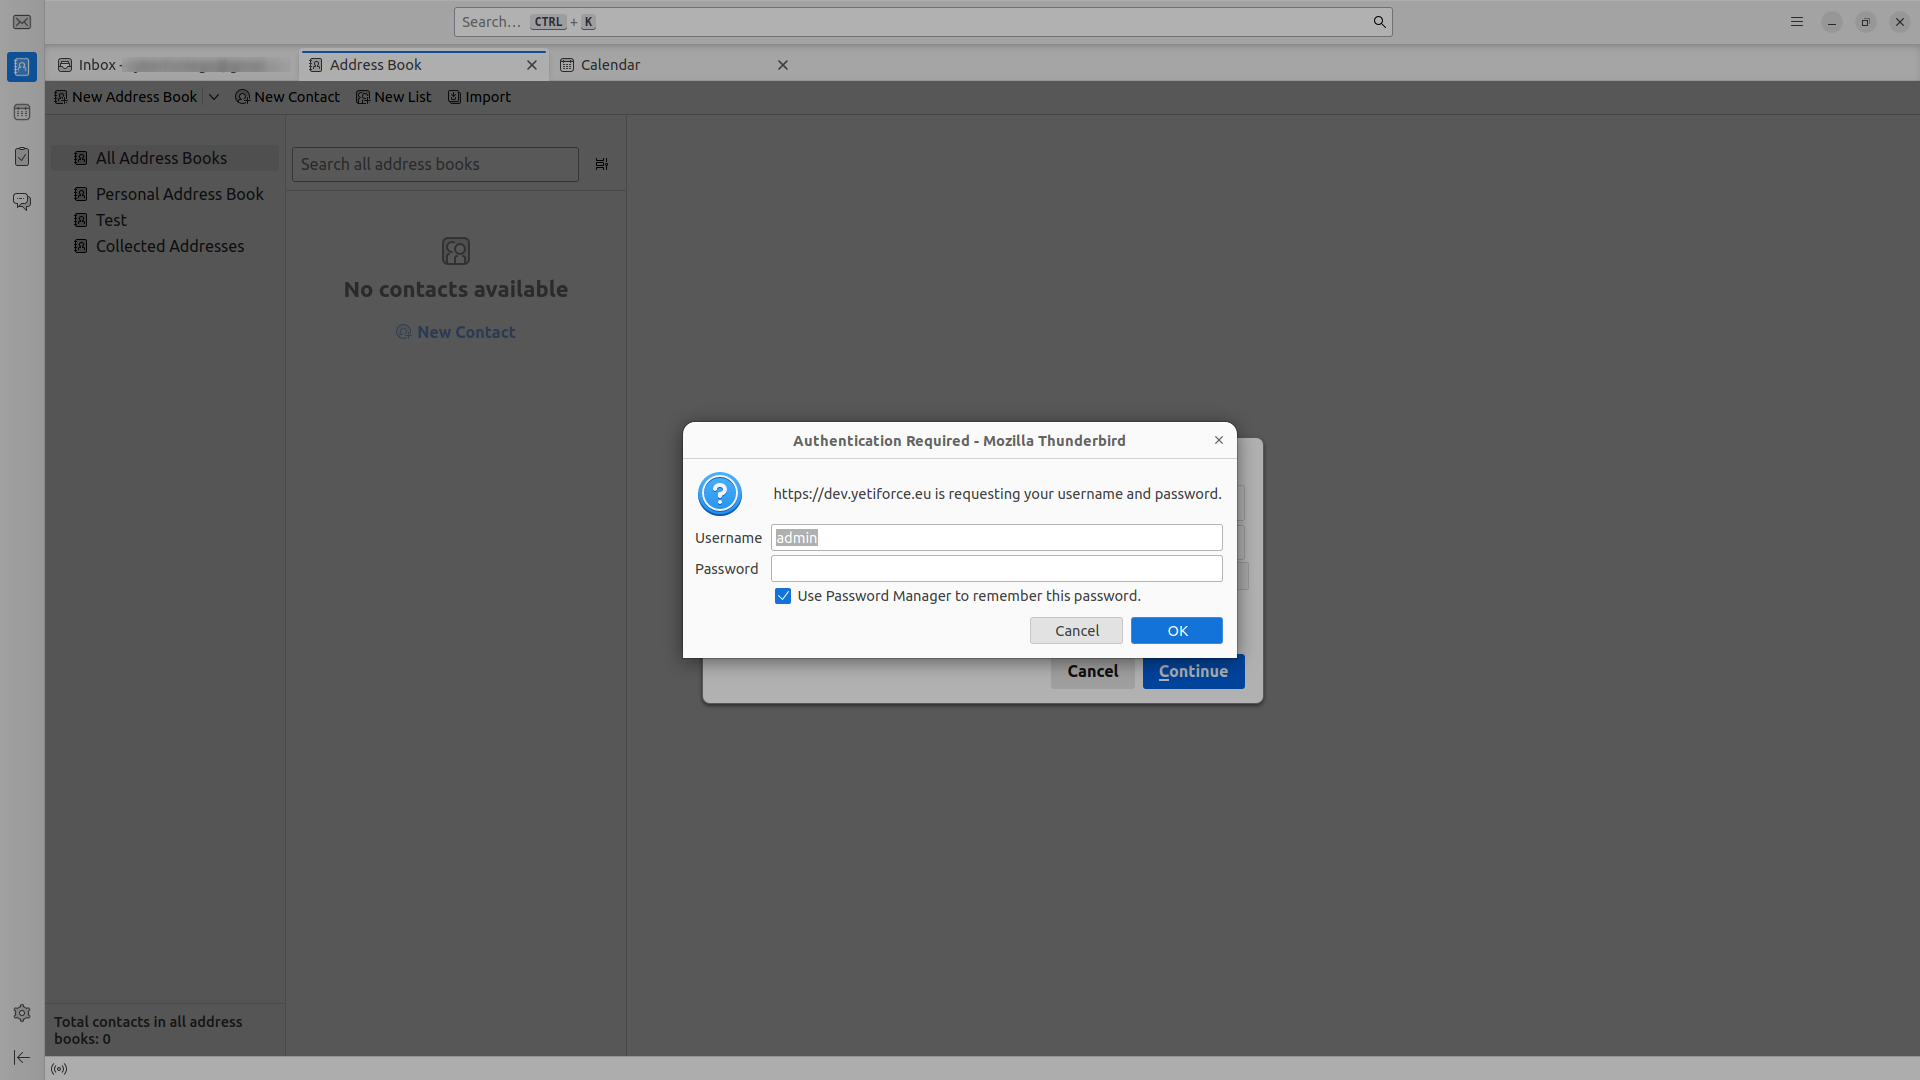
- Provide the following in the address book login window:
- Username: the
Loginvalue that appeared with the generated key. - Password: the
Keyvalue that appeared with the generated key.
- Username: the
After completing the steps above, your YetiForce contacts should successfully synchronize with your address book. This means that adding, editing, or deleting a contact in one application will be reflected in the others. Communication between YetiForce and your address book will occur automatically in both directions via the CRON mechanism, according to the frequency you set, ensuring data consistency and simplifying contact management.
If you're using other email tools, the integration process may vary. Please refer to the specific tool's documentation for detailed instructions on configuring CalDAV and CardDAV.