Genesys WDE by Whirly
Integracja z centralą telefoniczną za pośrednictwem aplikacji Genesys Workspace Desktop Edition.
Integracja z platformą Genesys Contact Center wymaga dedykowanego wdrożenia integracji, ponieważ jest uzależniona od procesów funkcjonujących w danej firmie.
Zalety i możliwości integracji:
- działa niezależnie od zalogowanego użytkownika
- integruje się z dedykowanym API
- dynamiczne prezentuje informacje znajdujące się w systemie YetiForce podczas odebrania połączenia
- obsługa i rejestrowanie zgód RODO zaakceptowanych na IVR
- obsługa połączeń telefonicznych, wiadomości email, wiadomości messenger, Chat na stronie WWW, kampanii SMS/Mail/telefonicznych
- wspiera ankiety IVR
- wyszukiwanie firm i kontaktów po przekazanych informacjach np. nip + token, numer telefonu, email, login messenger
- bezpieczna komunikacja za pomocą HMAC signature
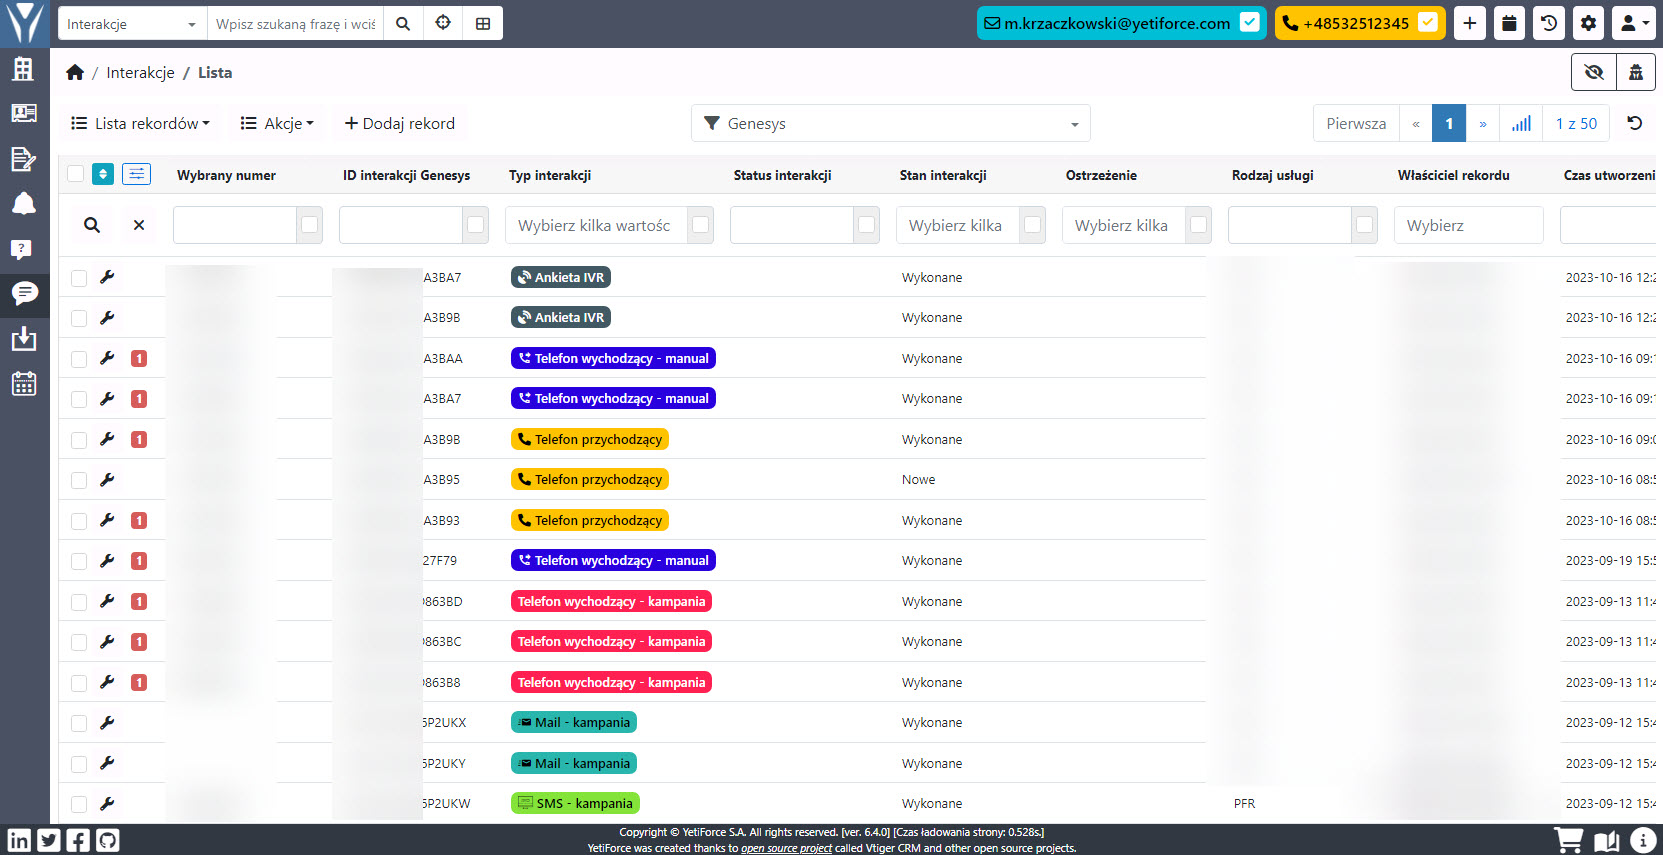
- historia wszystkich interakcji z firmą i kontaktami
- możliwość automatycznego tworzenia danych
Aktywuj
Due to the high complexity of the processes, the integration requires an extension implemented in Genesys from Whirly, and a dedicated implementation in the YetiForce system.
Konfiguracja
W celu uruchomienia integracji należy wykonać poniższe kroki:
Dodanie konfiguracji do PBX
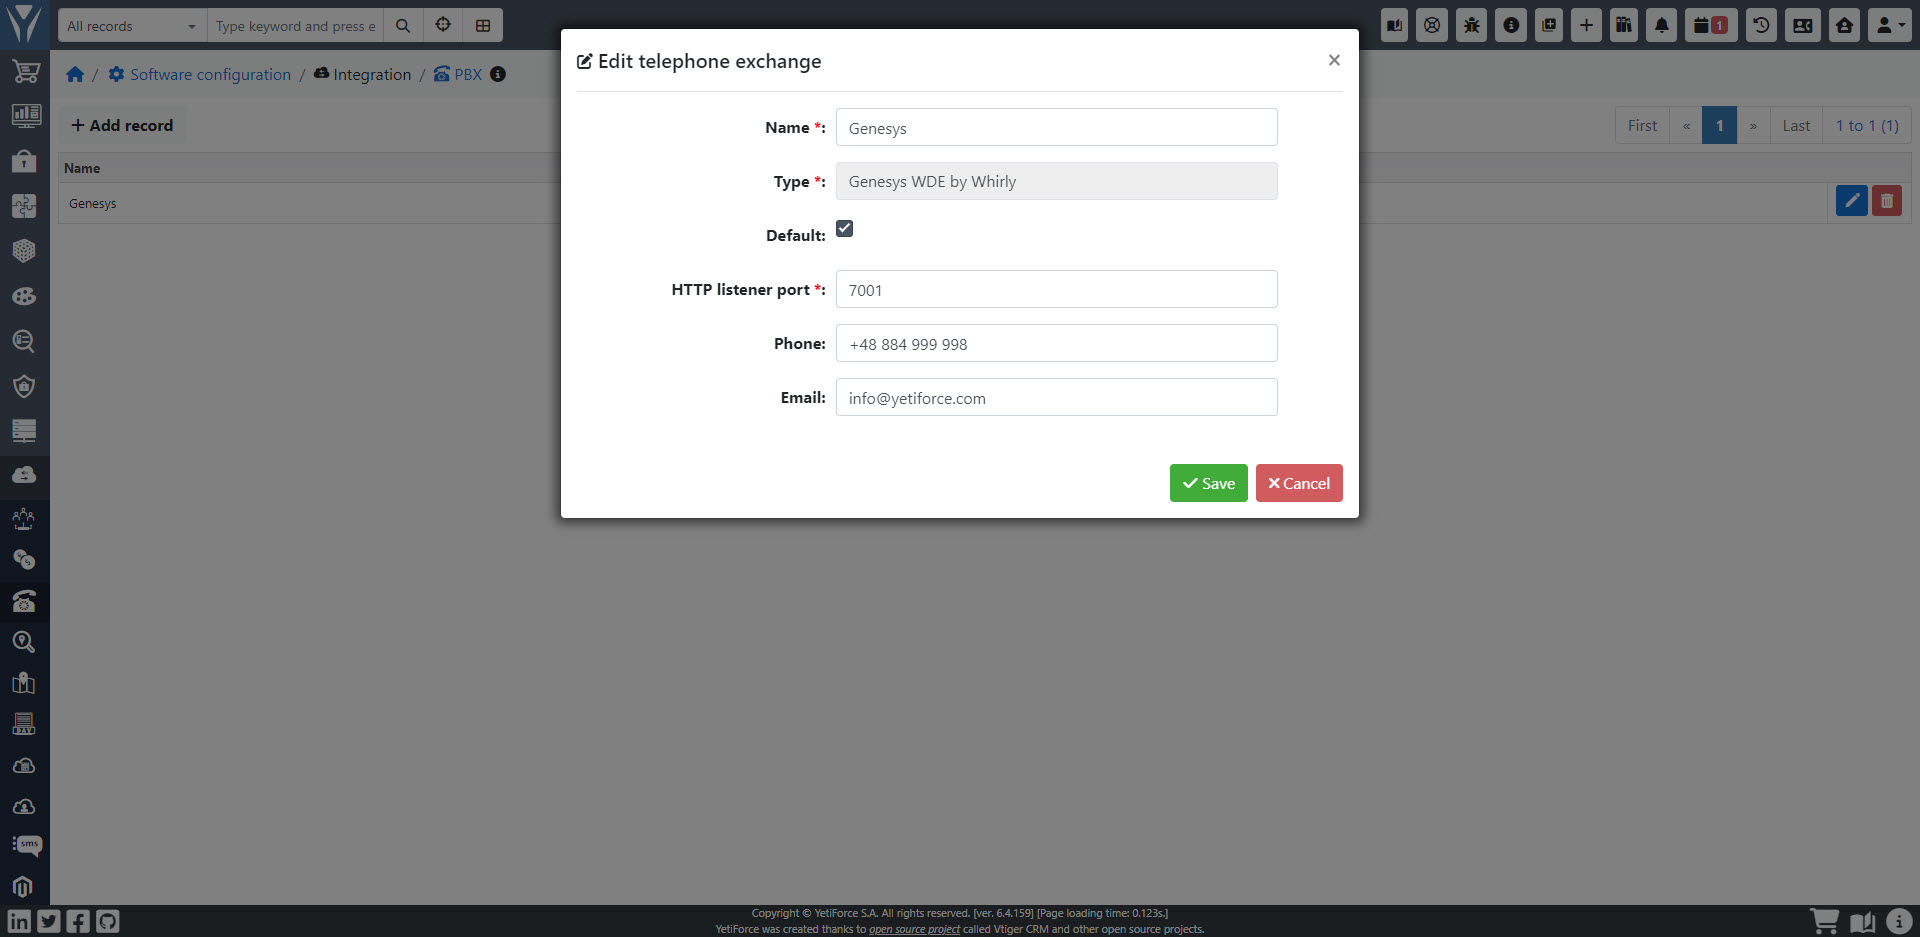
Dodajemy wpis dp PBX o typie Genesys WDE by Whirly
W oknie należy podać następujące informacje:
- Port nasłuchu HTTP - numer portu lokalnego, na którym nasłuchuje aplikacja WDE
- Telefon - wymagany na potrzeby połączeń wychodzących, centrala umożliwia obsługę wielu numerów telefonu i należy określić, który jest używany po kliknięciu na numer telefonu.
- Email - wymagany na potrzeby wysyłania wiadomości mailowych, centrala umożliwia obsługę wiadomości mail i należy określić, który adres mail ma być użyty po kliknięciu na adres e-mail.
Aktywacja dla użytkowników
Kolejnym krokiem jest aktywowanie integracji dla użytkowników, domyślnie system używa podstawowej obsługi protokołów dla telefonu i adresu mail.
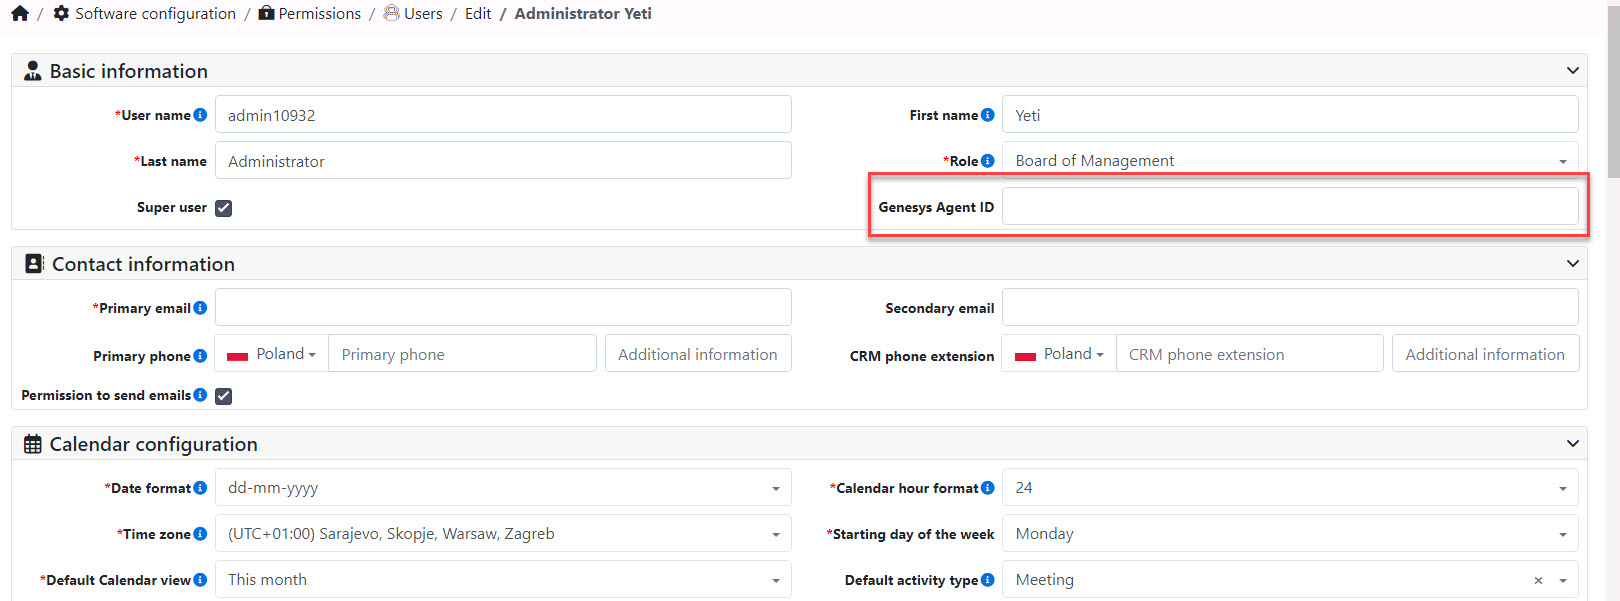
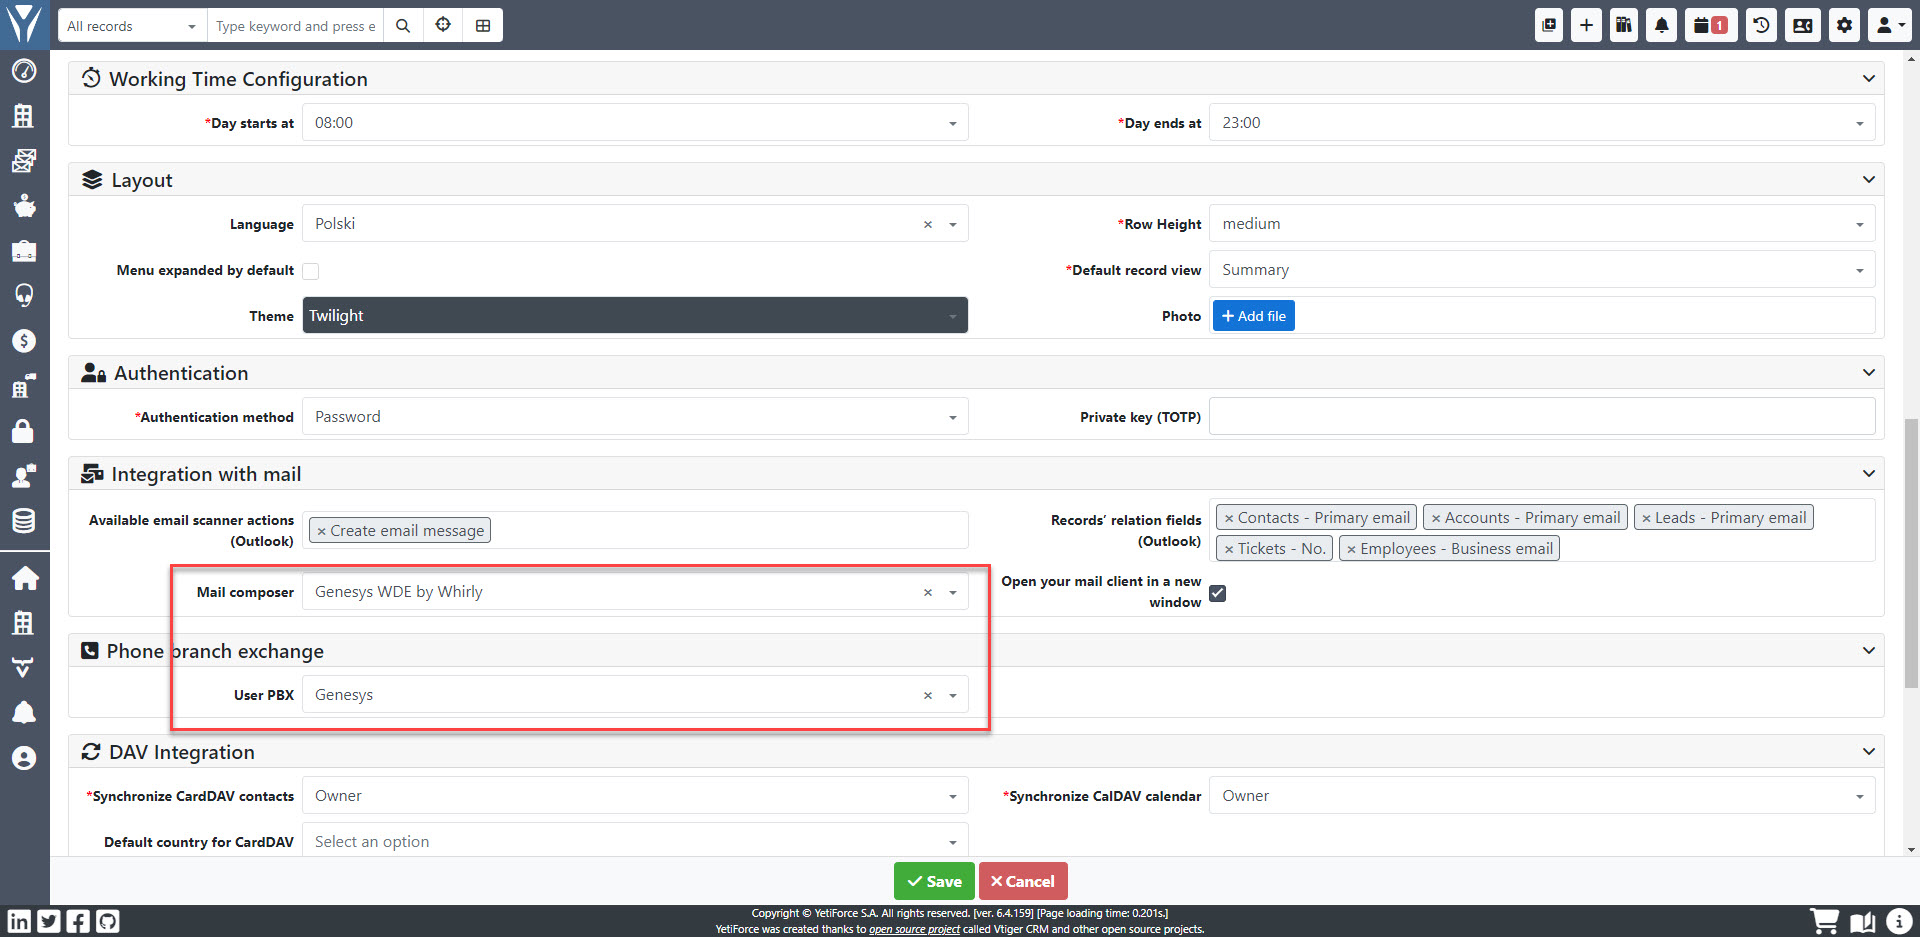
Należy wejść na użytkownika, który ma mieć aktywną integrację i odnaleźć pola:
- Genesys Agent ID (blok
Informacje podstawowe) - wprowadzamy login użytkownika w Genesys WDE
- Kompozytor poczty (blok
Integracja z pocztą e-mail) - wybieramyGenesys WDE by Whirly - PBX użytkownika (blok
Centrala telefoniczna) - wybieramy nazwę, którą wprowadziliśmy we wcześniejszym punkcie Dodanie konfiguracji do PBX
Dodanie konfiguracji do API
Każda interakcja wysyła do API żądanie z pełnymi danymi i w odpowiedzi system YetiForce zwraca adres URL, który ma zostać uruchomiony użytkownikowi w Genesys WDE.
W tym celu należy dodać konfigurację w Konfiguracja systemu → Integracja → Web service - Aplikacje o typie PBX.
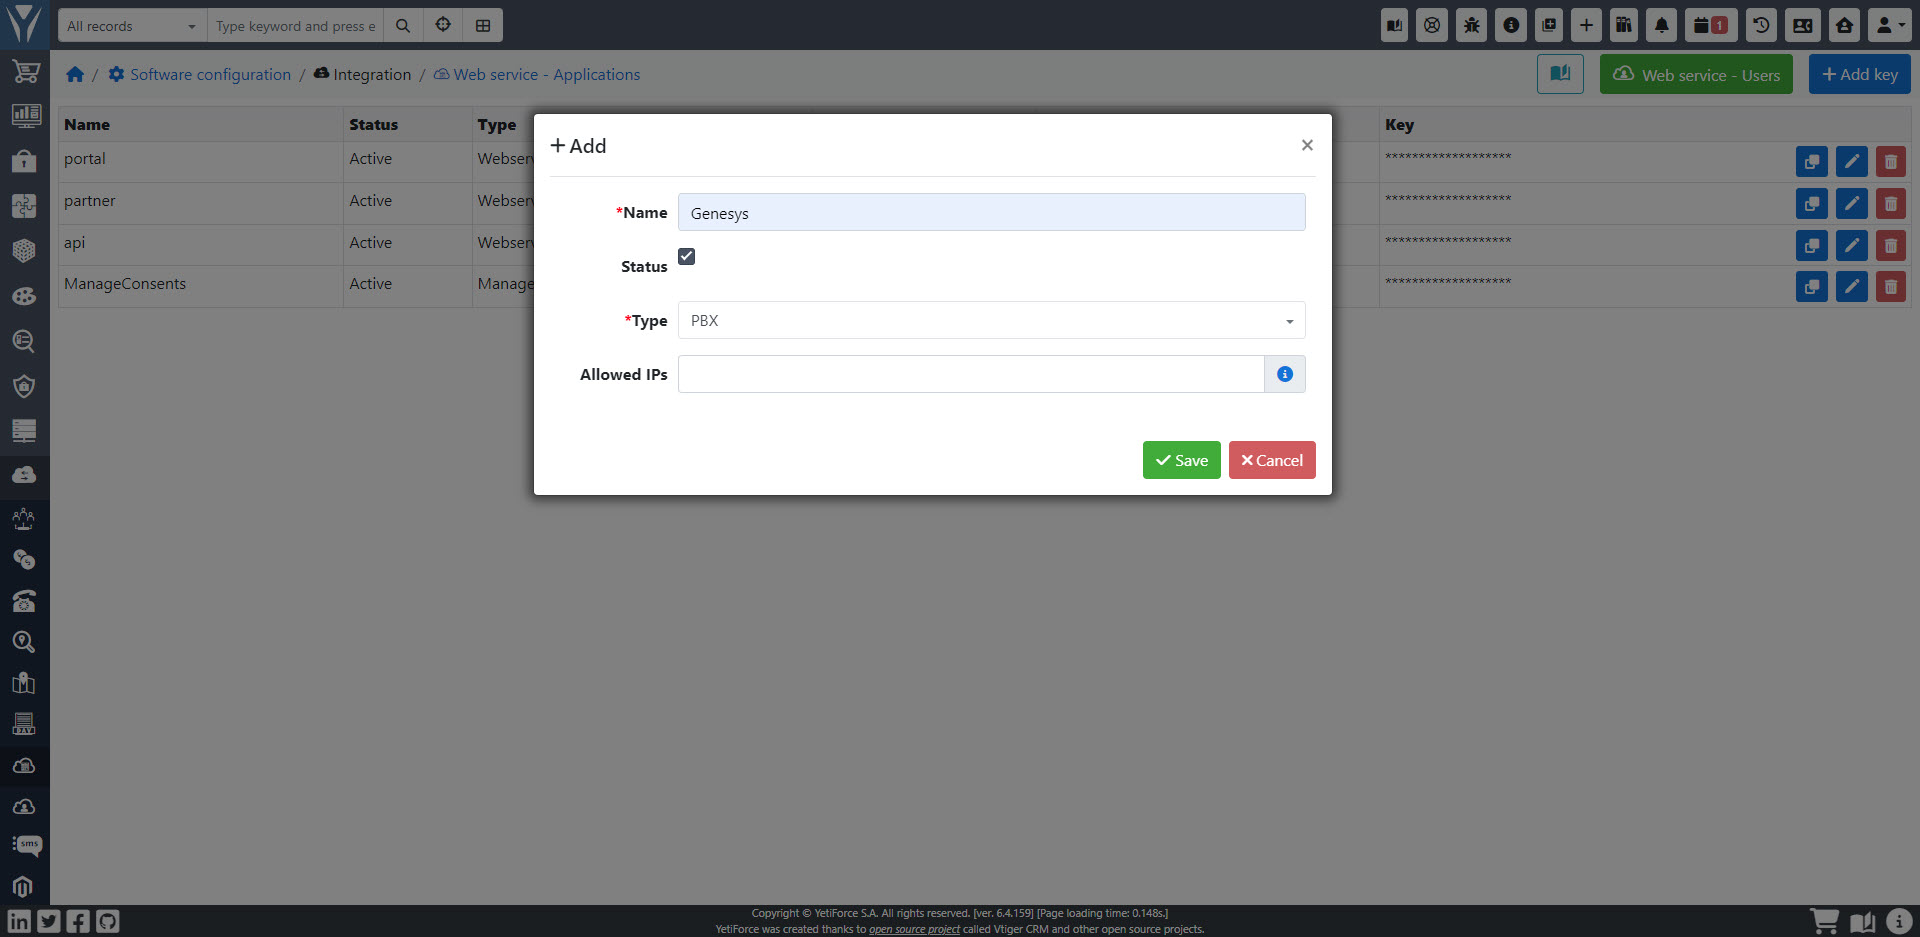
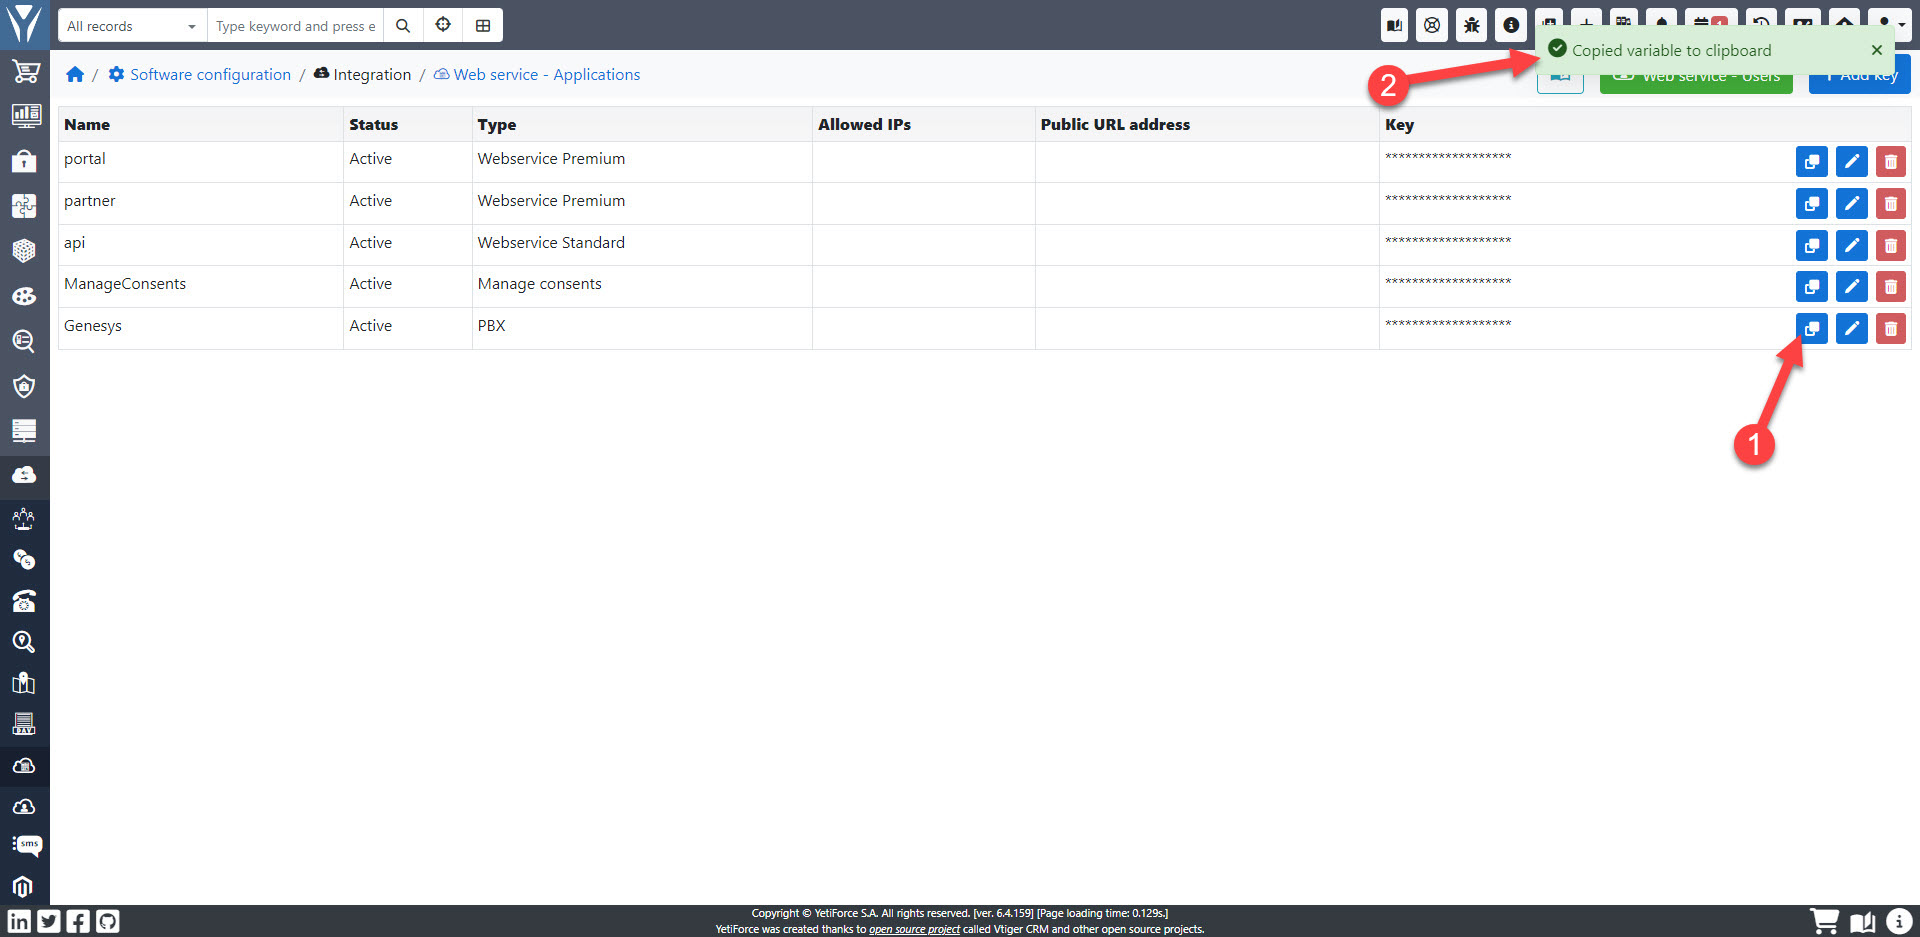
Następnie należy skopiować klucz i wprowadzić go w konfiguracji Genesys Administrator.
Dodanie konfiguracji do Genesys Administrator
W panelu Genesys Administrator wprowadzamy następujące parametry:
- Endpoint
__YETIFORCE_PATH__/webservice/PBX/GenesysWdeWhirly/ - Token/klucz wygenerowany w
Web service - Aplikacje
