Outlook configuration
This article is a supplement to the YetiForce integration with mail clients guide. It focuses on showing how to generate a Client ID and Client Secret in Azure AD. These details are necessary to authenticate the connection between YetiForce and your Outlook account.
Step 1: Create a project in the Microsoft Azure Portal
- Go to the Azure Portal.
- Log in using your Microsoft account.
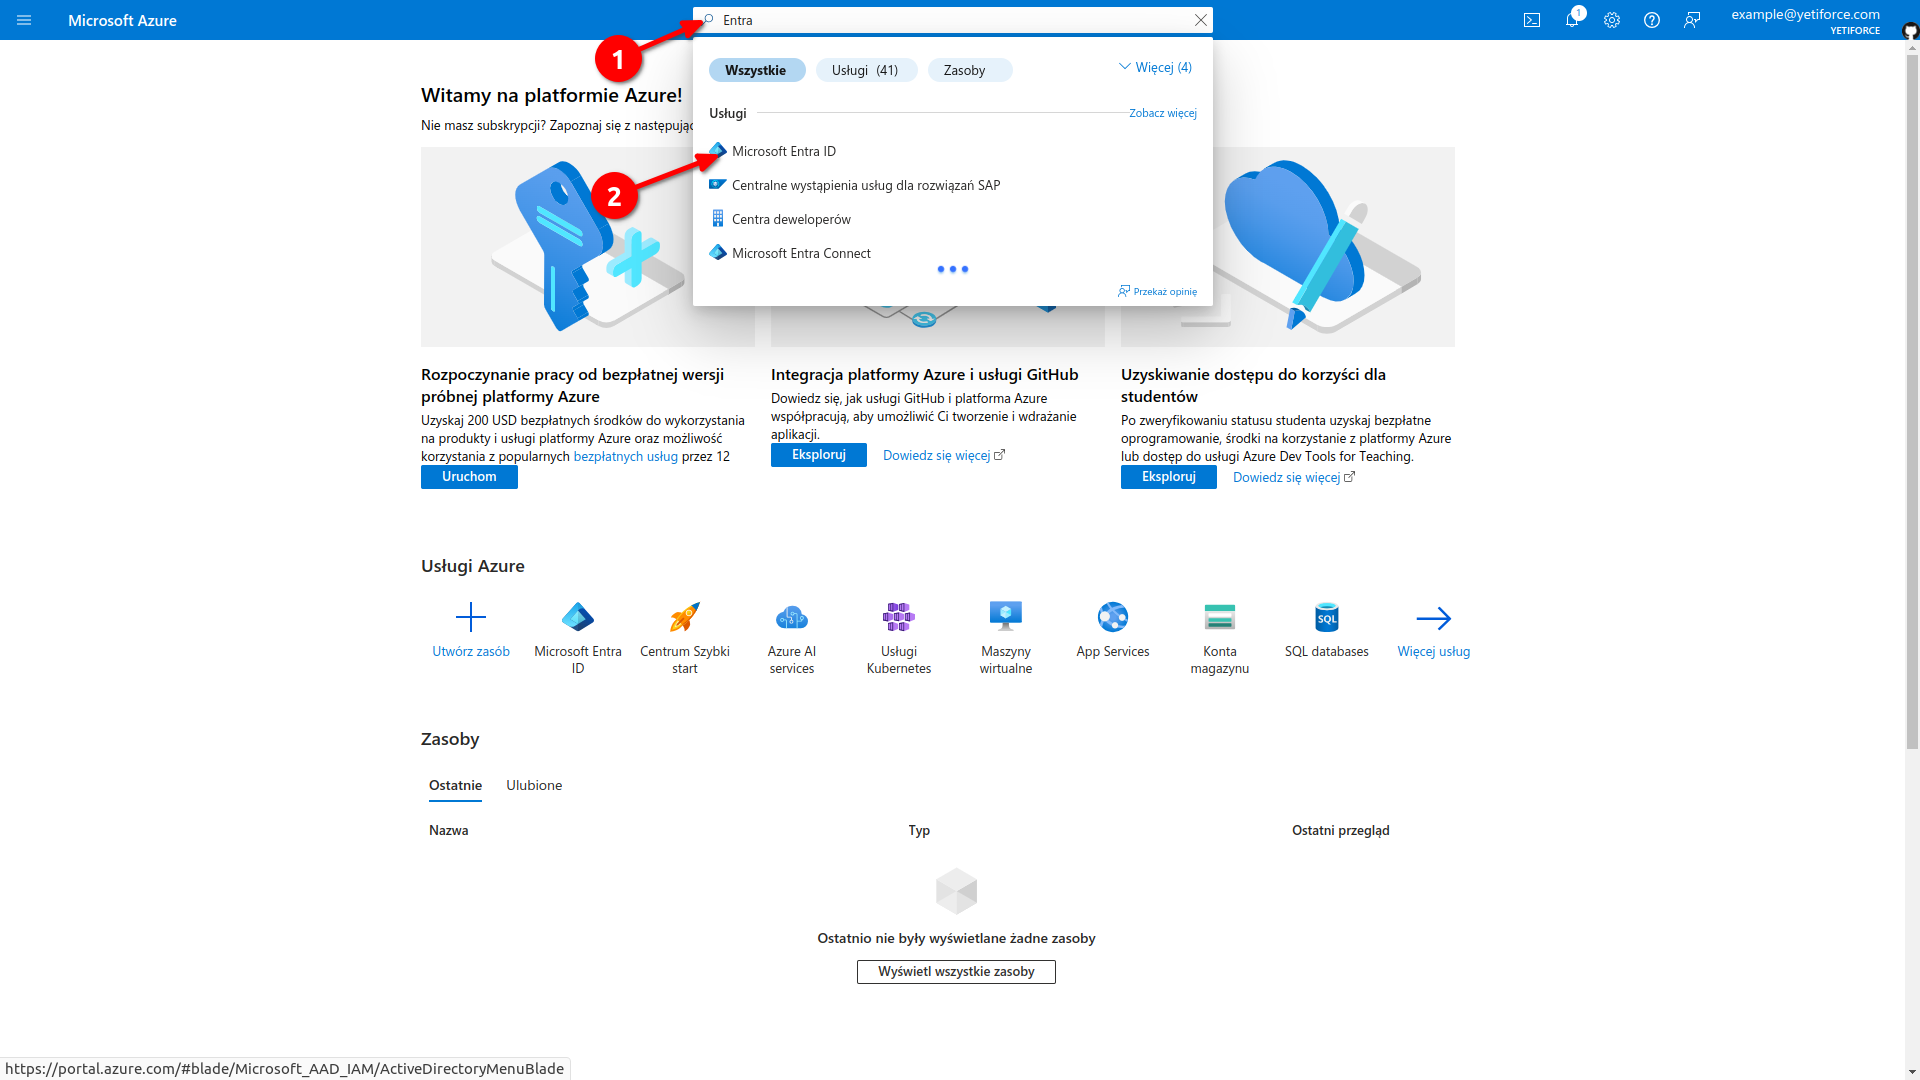
- In the search box at the top, enter
Microsoft Entra IDand select the service from the list.
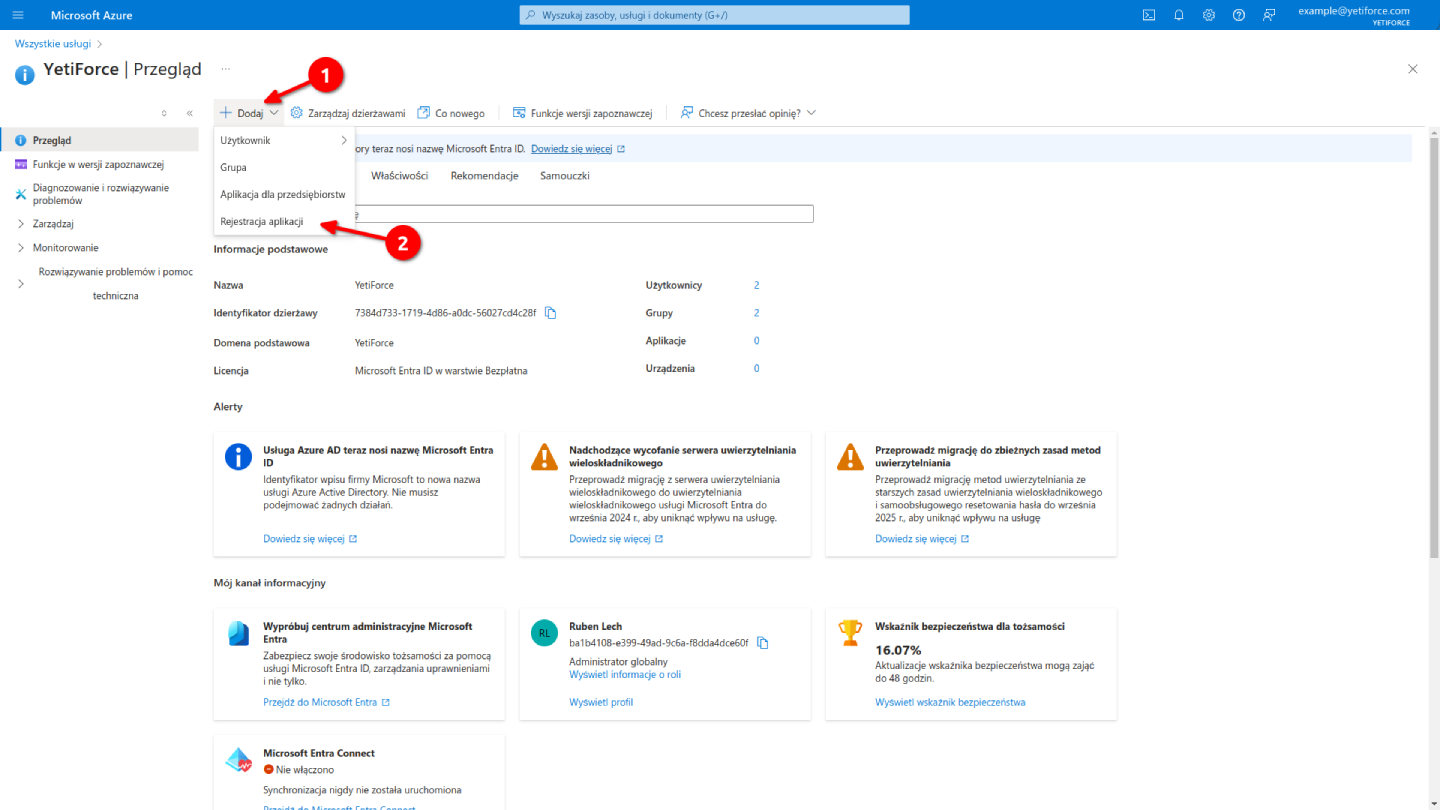
- Click + Create and then select
Register applicationfrom the list.
- Fill the form.
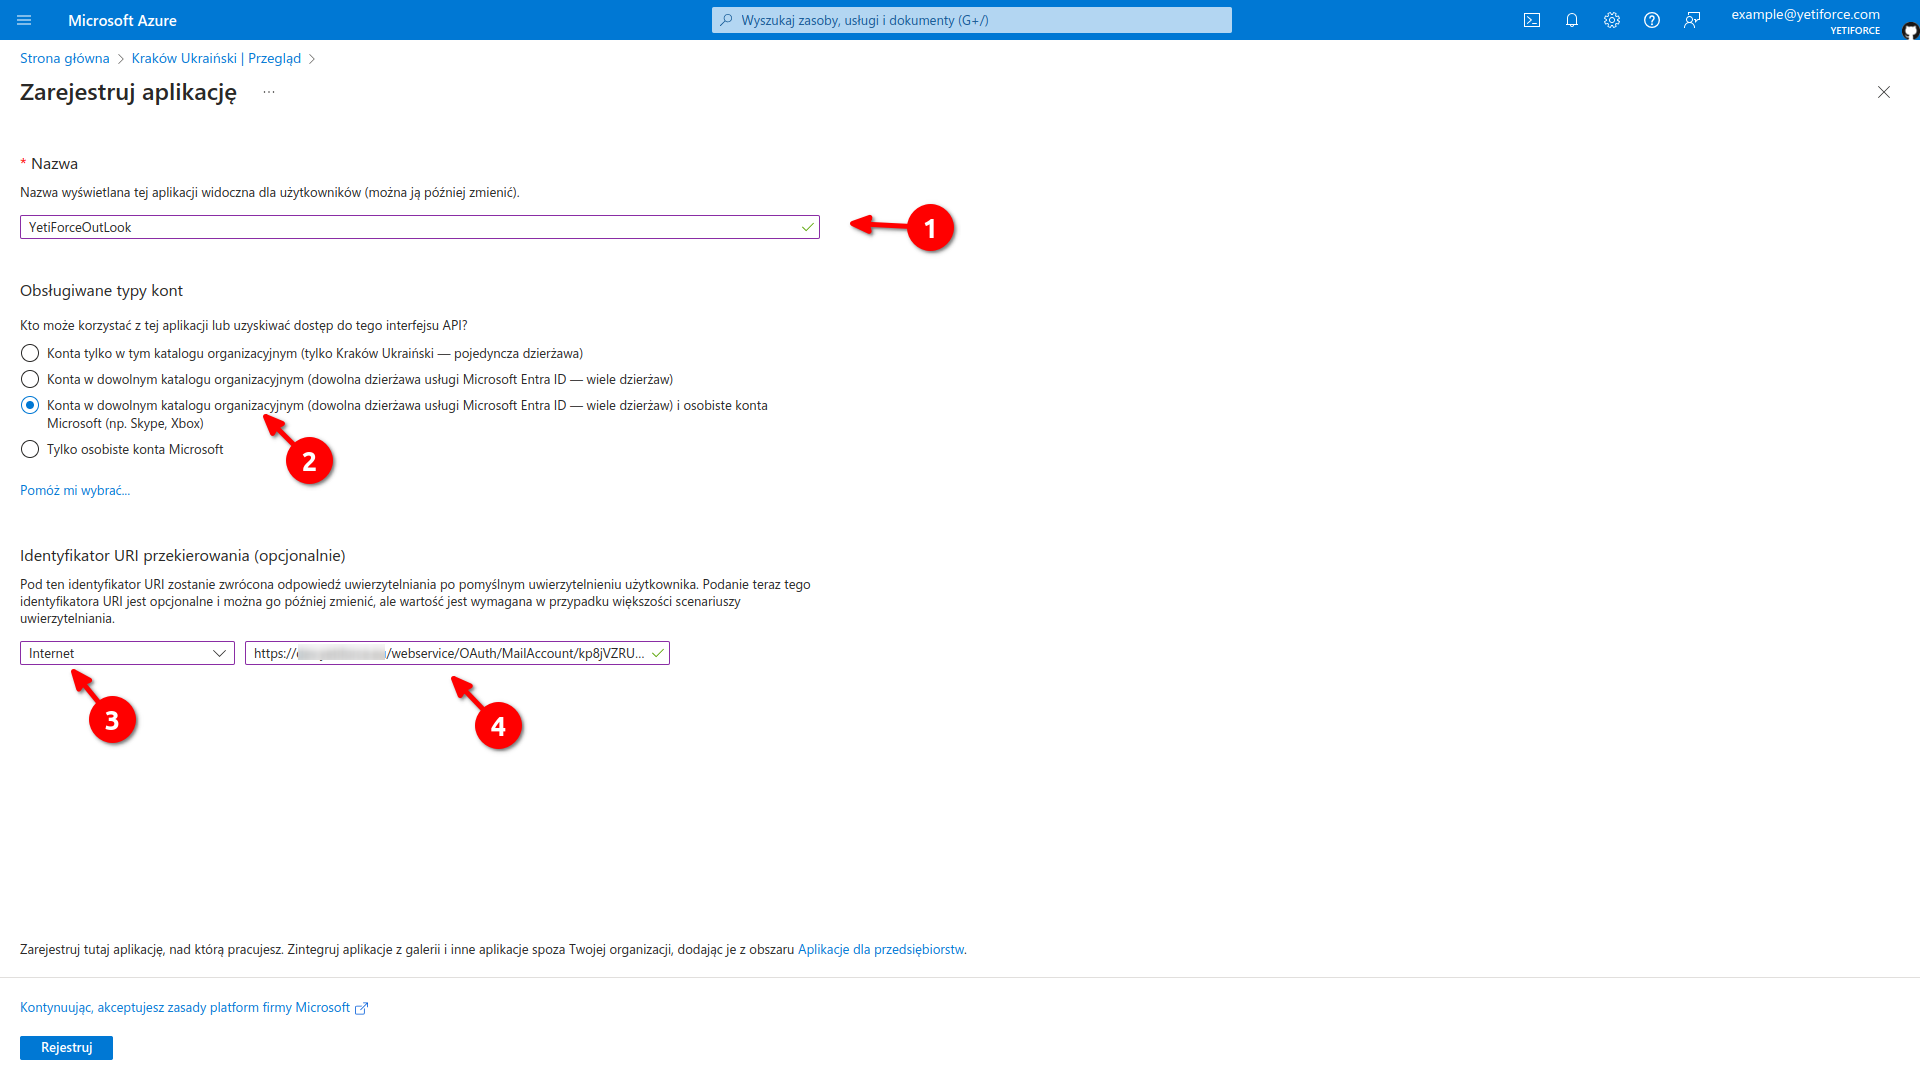
- Name - A unique name that will be used for app identification.
- Supported account types - Select
Accounts in any organizational directory. - Redirect URI - In the first field, select
Webfrom the list. The value for the second field should be copied from the YetiForce system. The process is described below.
Step 2: Find the Redirect URI value
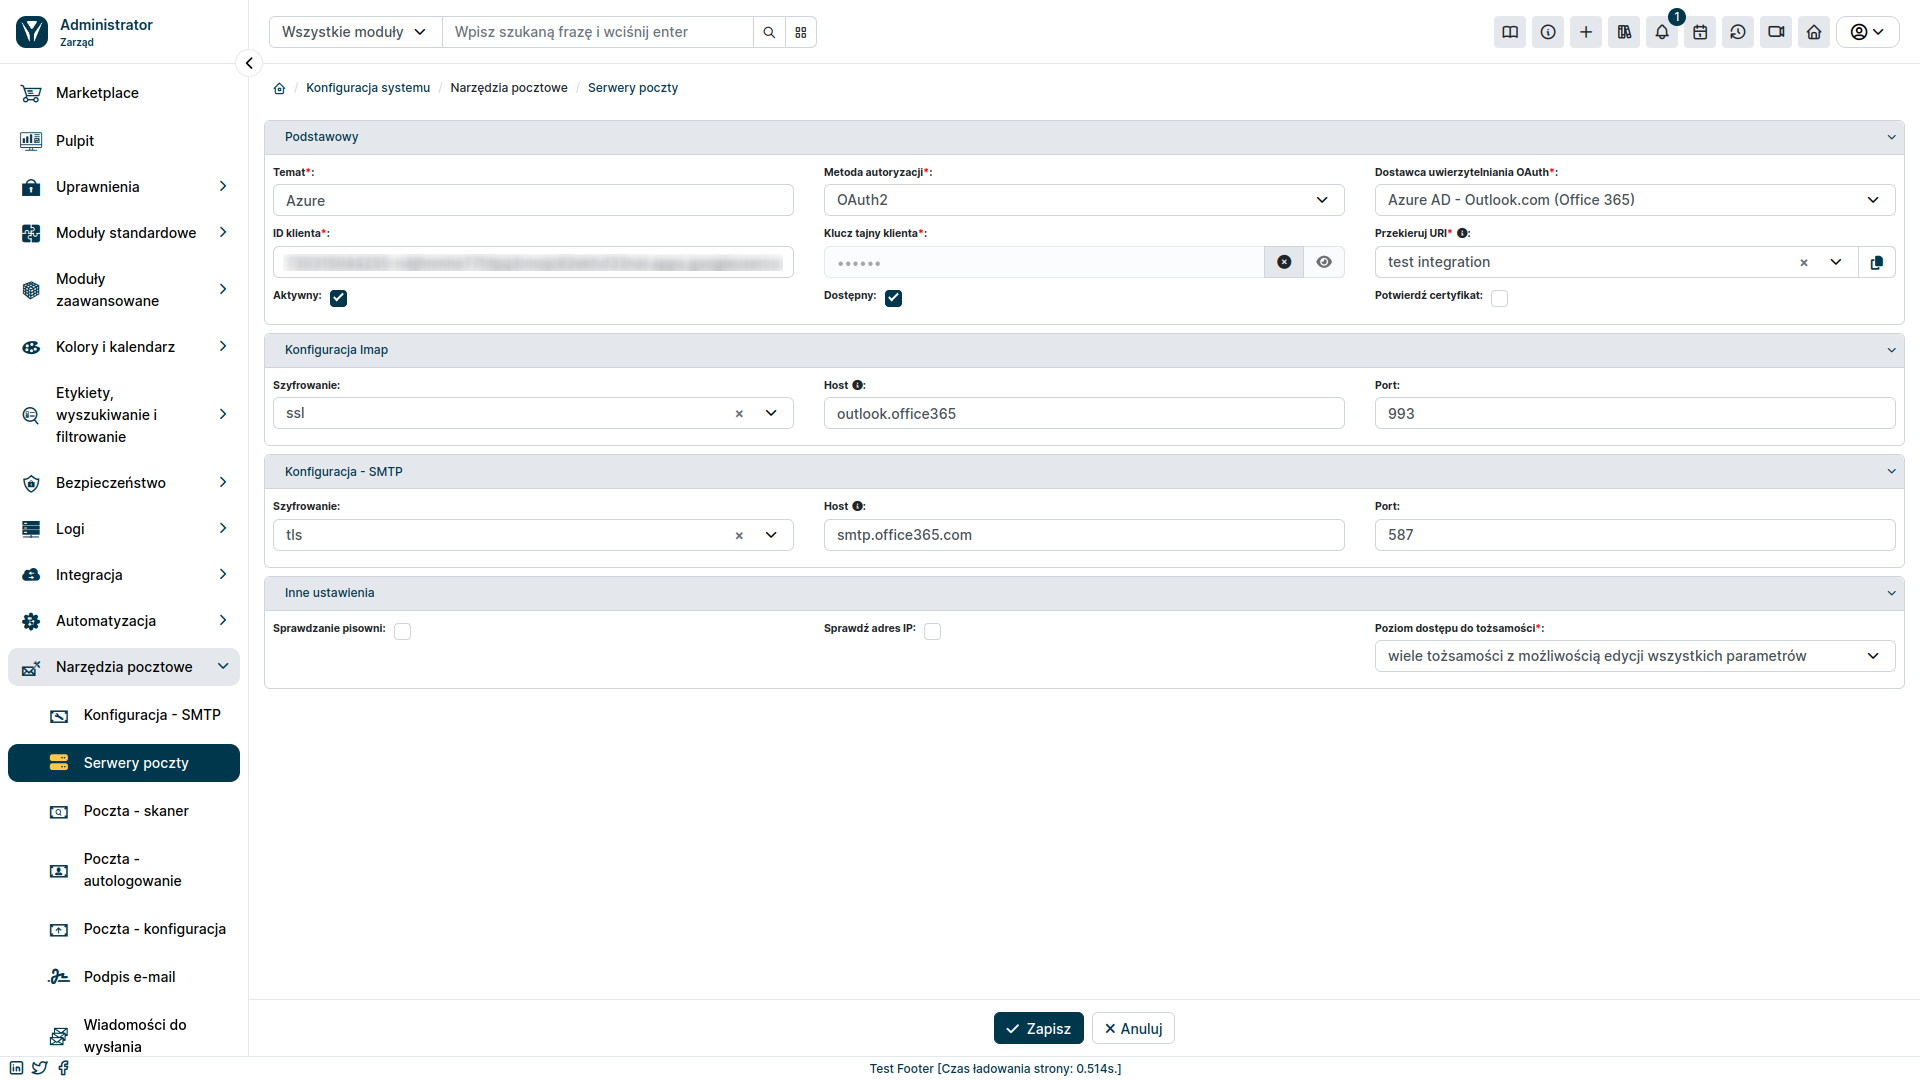
Return to the mail server creation process described in this article. Make sure that the Redirect URI field contains the name of the application you created for mail integration. Then copy the redirect URI value by pressing the button marked in the screenshot.

Step 3: Proceed with the registration of your application in the Microsoft Azure portal
Paste the copied Redirect URI value from YetiForce into the Redirect URI field of the registration form in the Microsoft Azure portal. Then click the Register button.
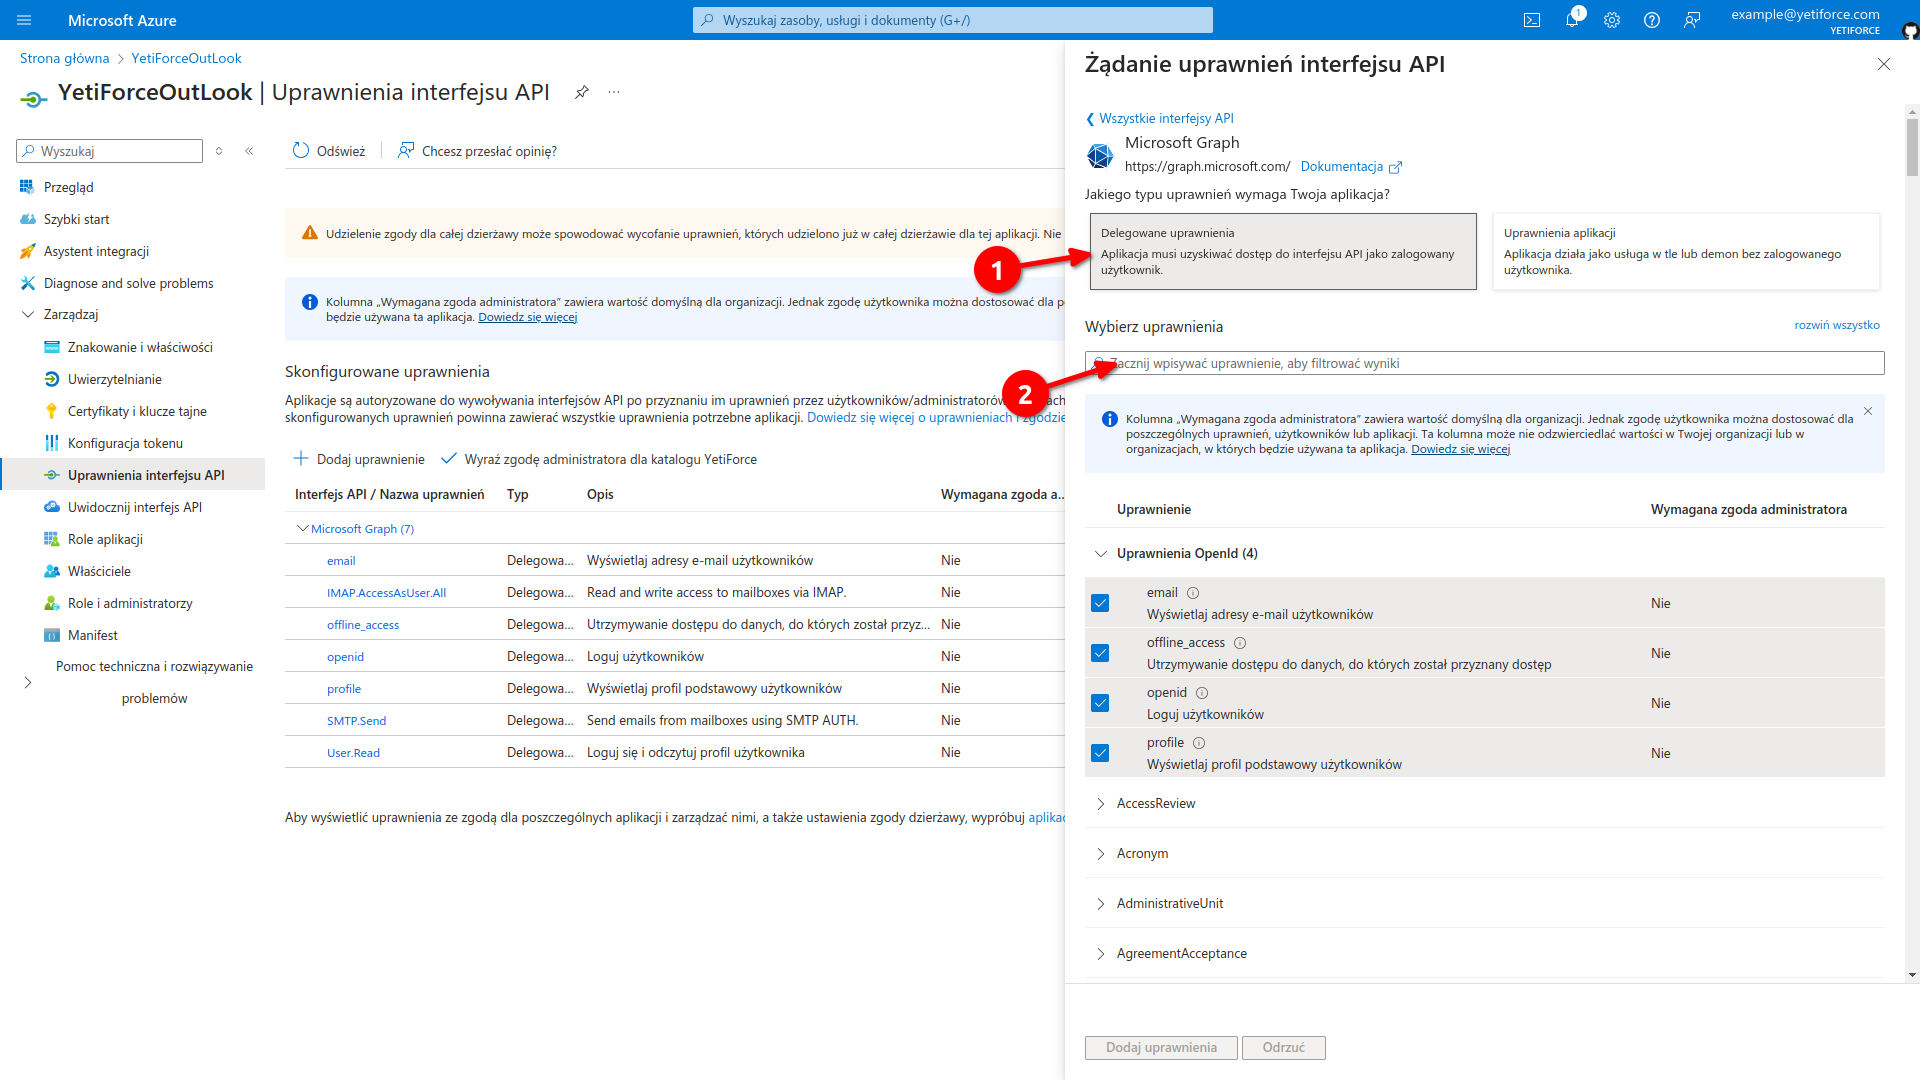
Step 4: Grant permissions
The application requires necessary permissions.
- From the menu on the left, select
API permissions. - Click + Add permission.
- Select
Microsoft Graphin the popup window.
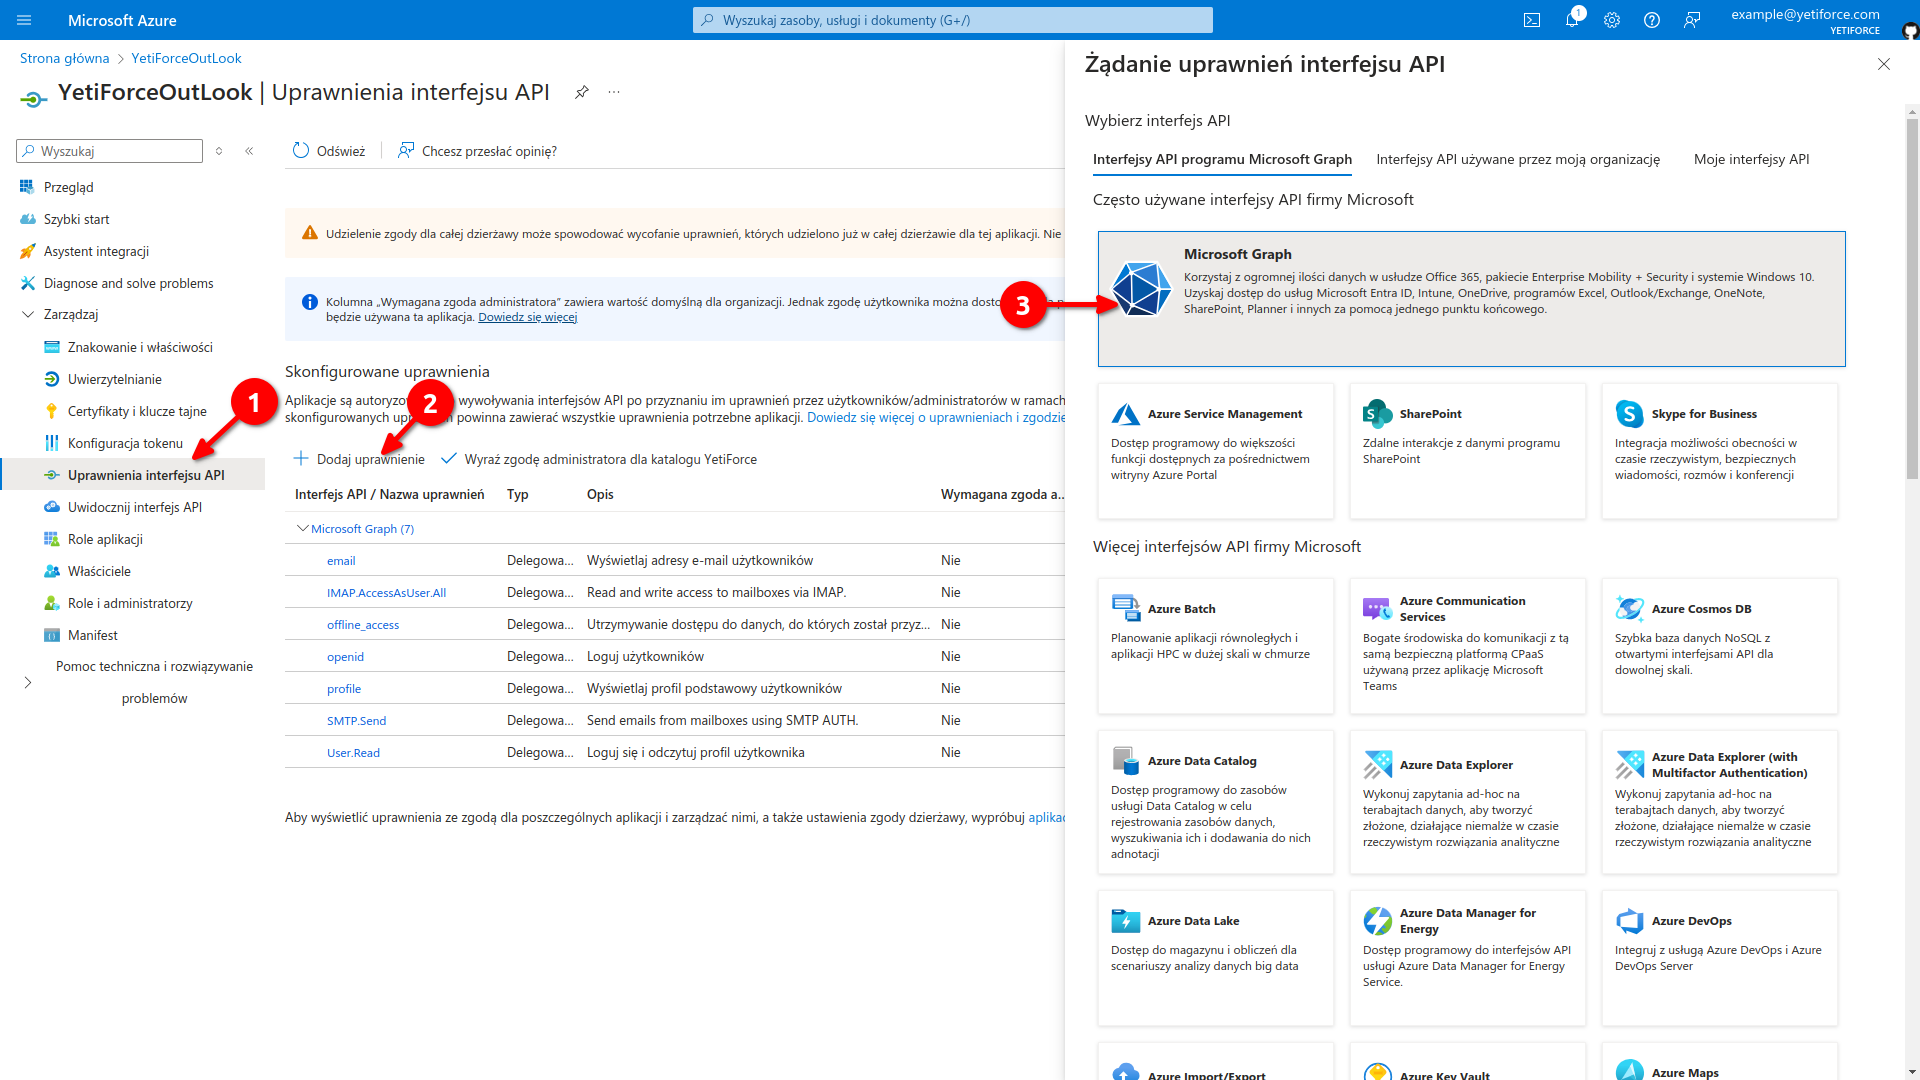
- Select permission type:
Delegated permissions. - Using the search bar or list, select the following permissions:
- IMAP AccessAsUser.All
- offline_access
- profile
- SMTP Send
- User.Read
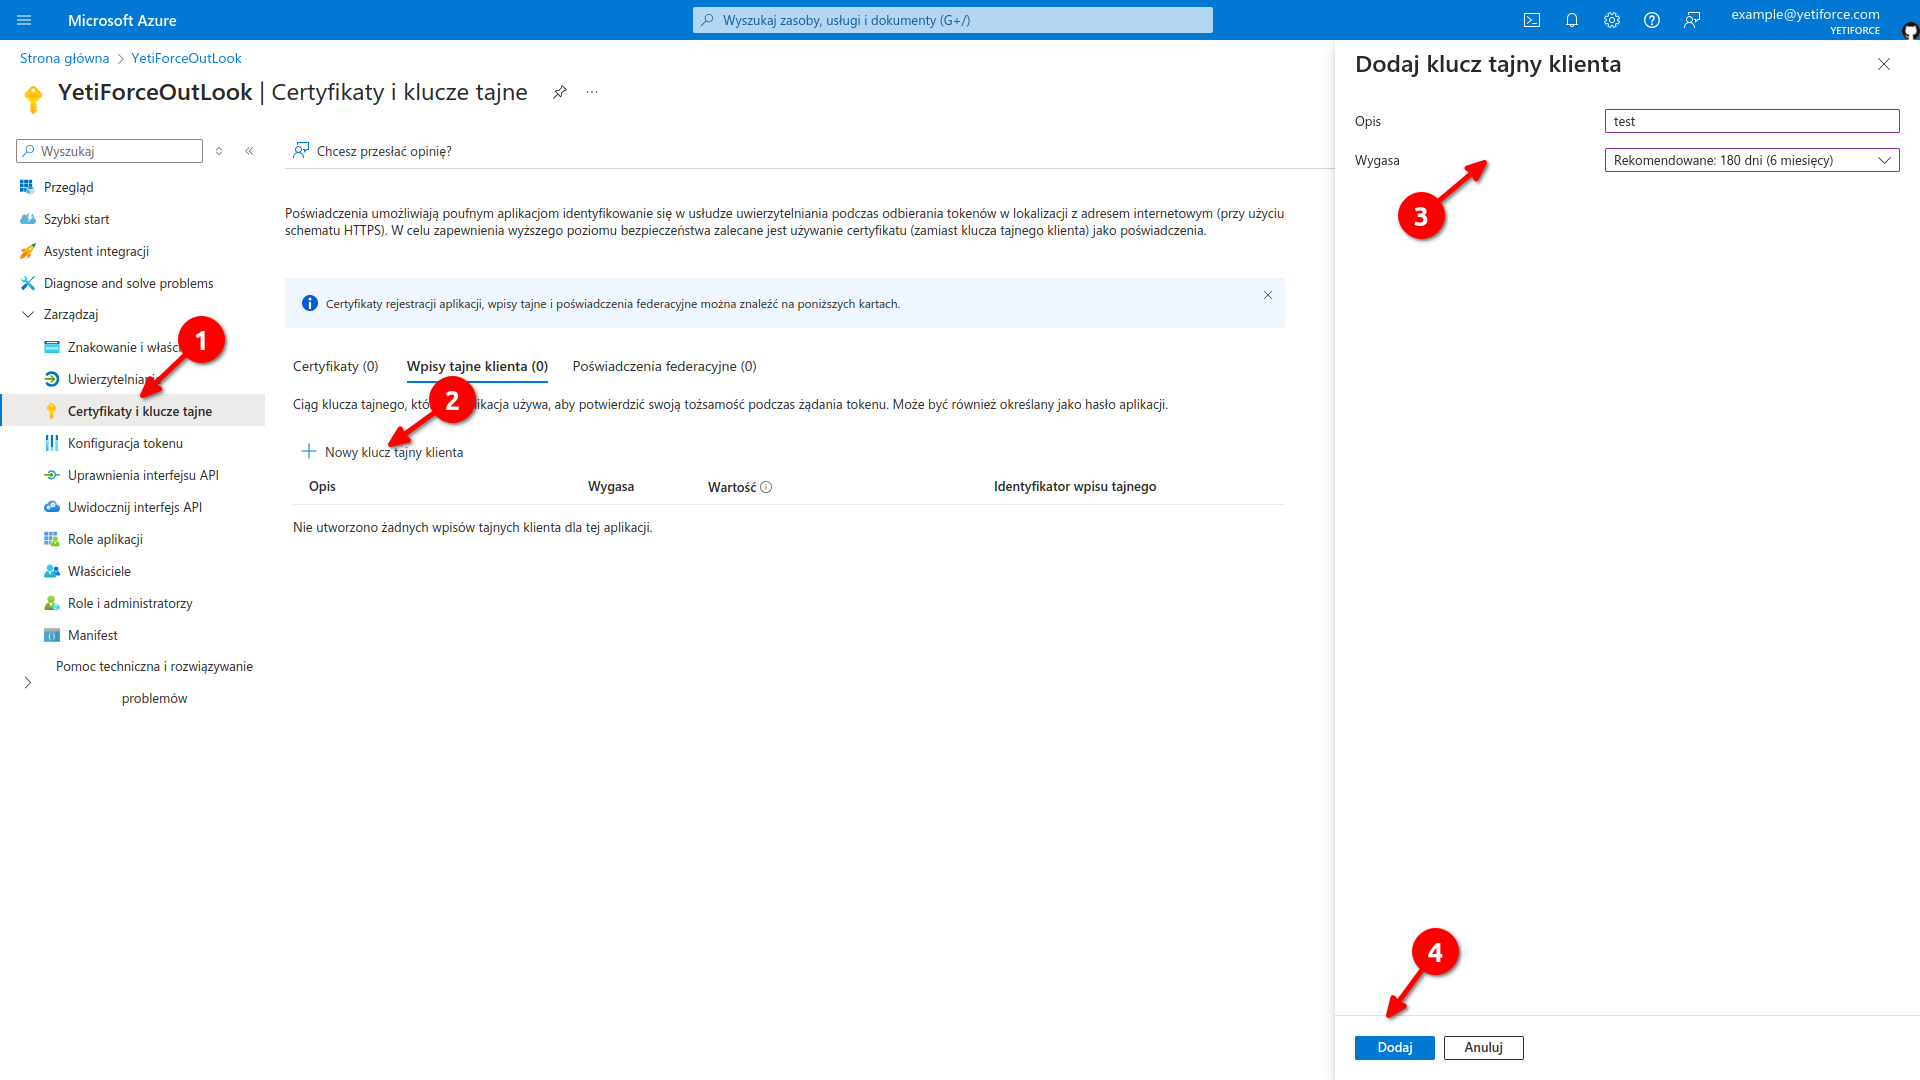
Step 5: Add key
- From the menu on the left side select
Certificates & secrets, and then click + New client Secret. - Enter any key name in the right panel and
- Confirm the new key by clicking the Add button
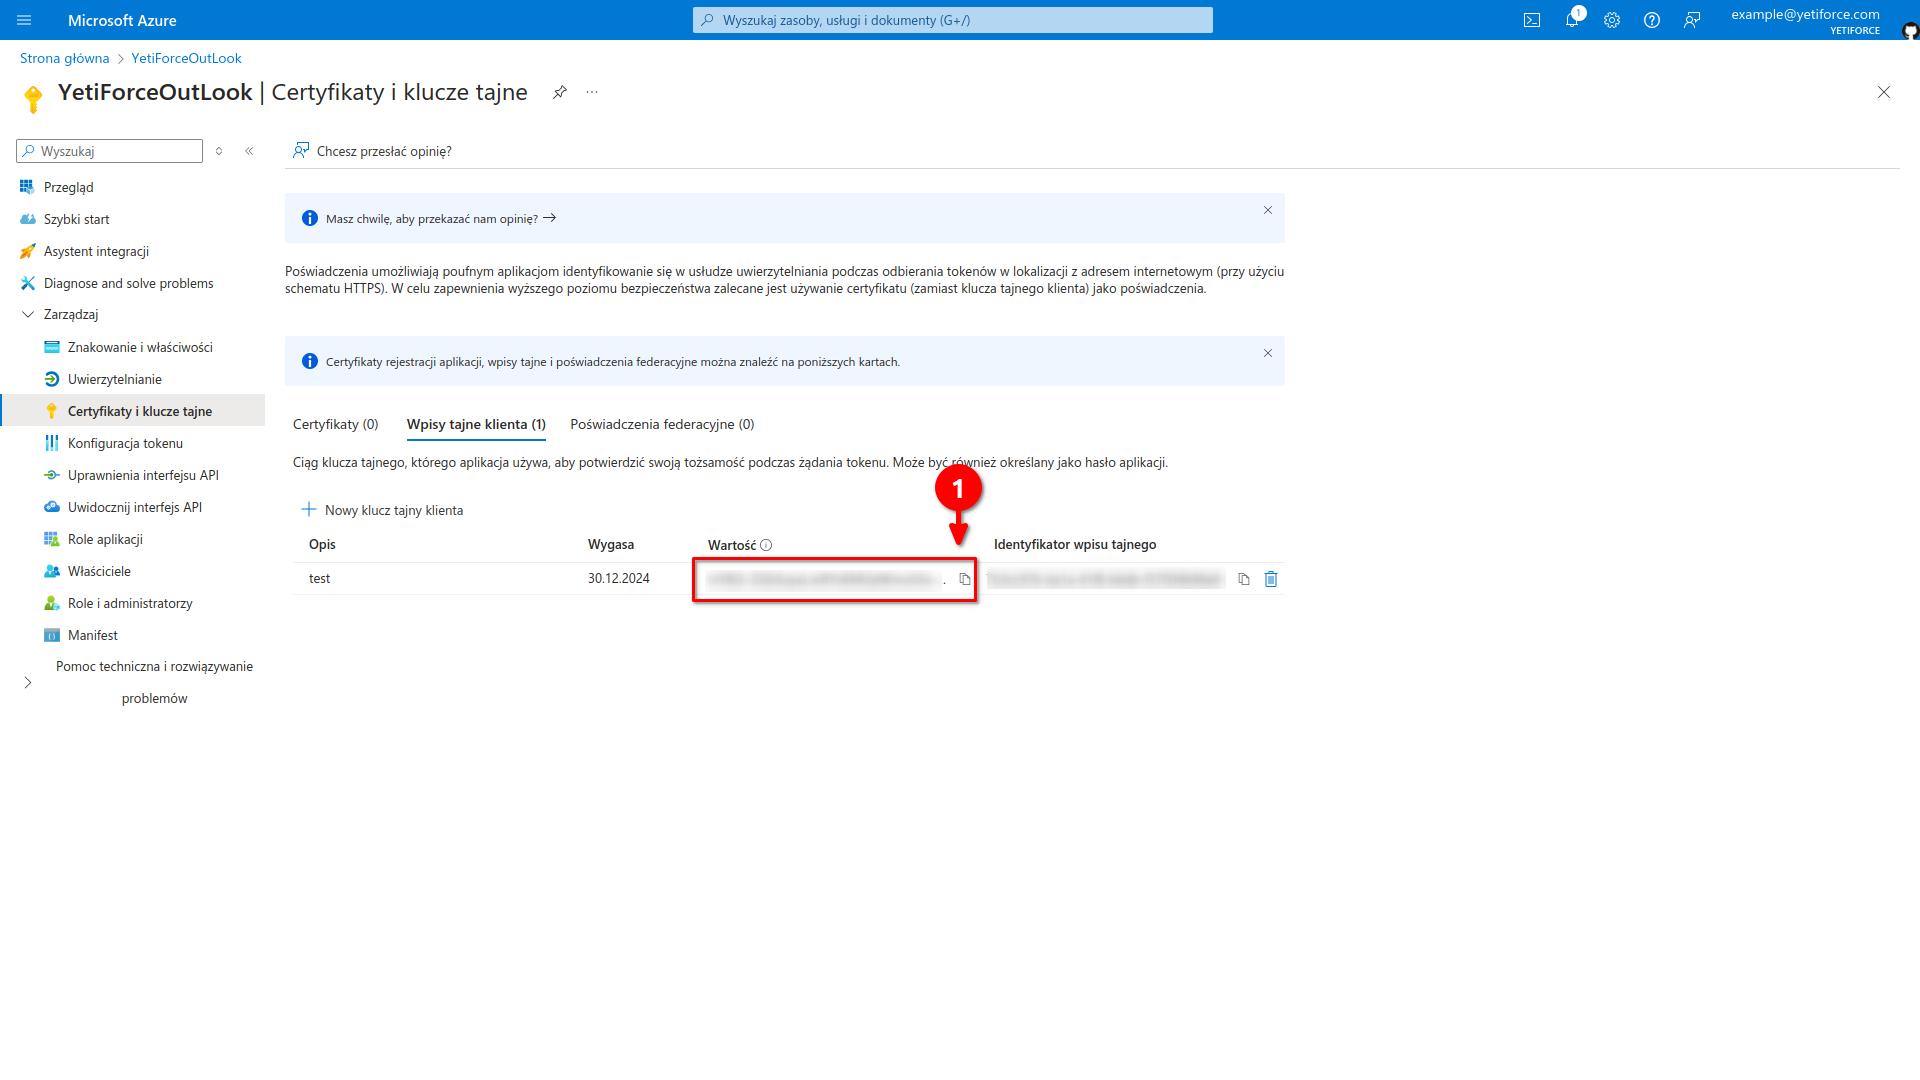
Step 6: Client Secret
After adding the key, a Client Secret will appear, copy it.
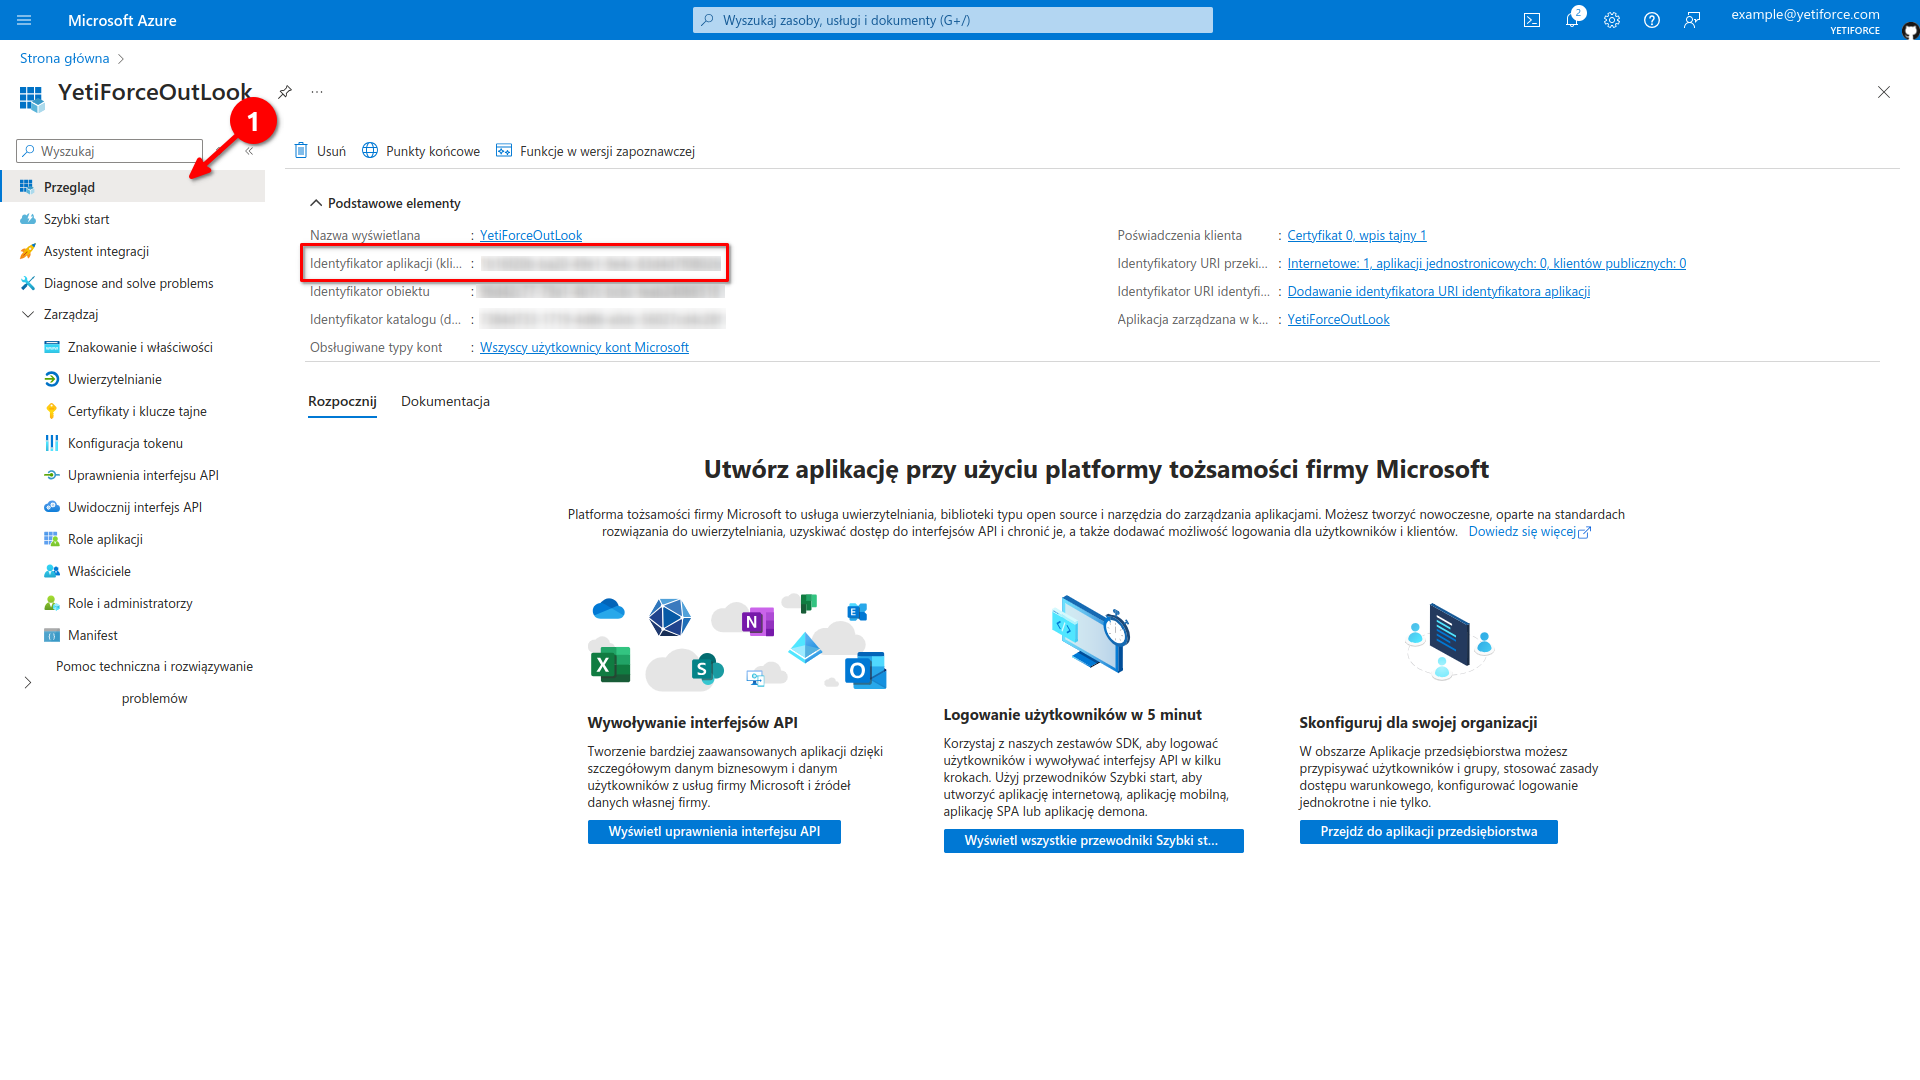
Step 7: Client ID
To get the Client ID value, go to the Overview tab and then copy the Application ID.
Step 8: Add mail sever in YetiForce
Once you have the Client ID and Client Secret, fill out the rest of the form that you started creating in this article.
Form fields
- Subject: A unique name that will be used for identification.
- Authorization method:
OAuth2. - OAuth Authentication Provider: select
Azure AD - Outlook.com (Office 365). - Client ID: value from Step 7.
- Client secret: value from Step 6.
- Redirect URI - we select an application created for integration with the mail service.
Now complete the IMAP and SMTP configuration according to your email provider's recommendations.
After adding the mail account, you need to link it with user accounts. This process is described in this article.